
React Native Environment Setups

There is a different alternative for React Native environment setup (installation), depends upon the operating system you use.

The instructions are quite different for each development and target operating system.
In this tutorial, we will use Windows as a development operating system and Android as a target operating system.

Developing app using React Native framework requires Node, React Native command line interface, Python2, JDK, and Android Studio.
Here, we are using a favorite package manager Chocolatey for Windows. Using this, we can install a recent version of Python, and Java SE Development Kit (JDK).


Steps to Setup React Native Environment

1. Visit Chocolatey, and click "Install Chocolatey Now" it open another URL.


React Native Environment Setup

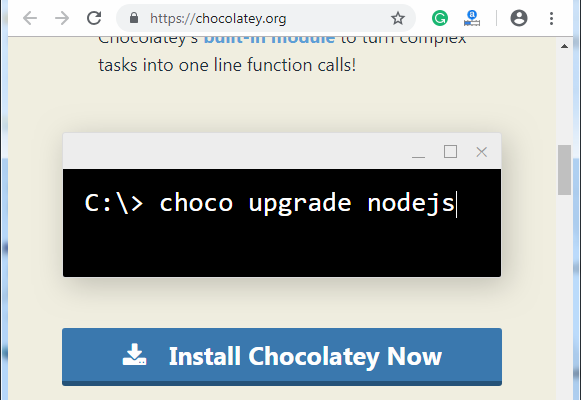
2. Install chocolatey setup, copy the code provided in Install with cmd.exe section.
  1. @"%SystemRoot%\System32\WindowsPowerShell\v1.0\powershell.exe" -NoProfile -InputFormat None -ExecutionPolicy Bypass -Command "iex ((New-Object System.Net.WebClient).DownloadString('https://chocolatey.org/install.ps1'))" && SET "PATH=%PATH%;%ALLUSERSPROFILE%\chocolatey\bin"  
React Native Environment Setup

3. Open your Command Prompt in Administrative mode (right-click Command Prompt and select "Run as Administrator"), paste this code and click enter. It will install Chocolatey.

React Native Environment Setup


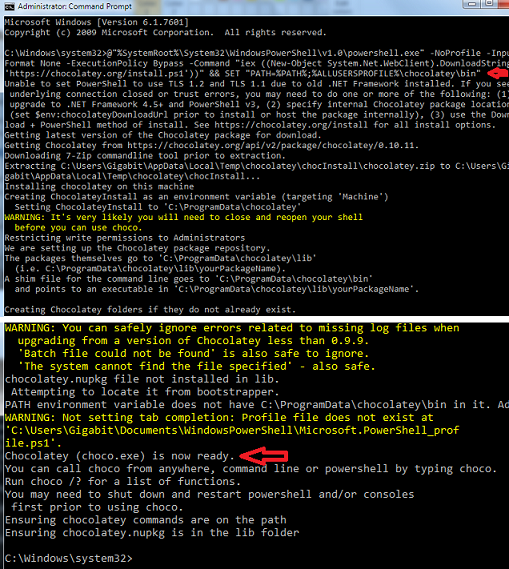
4. In the Administrative mode of command prompt, paste the code and run it (install Node.js, Python, and JDK).

If you have already installed Node.js, make sure it has version above 8 and if you have already installed JDK, make it version 8 or newer version.

  1. choco install -y nodejs.install python2 jdk8  
React Native Environment Setup

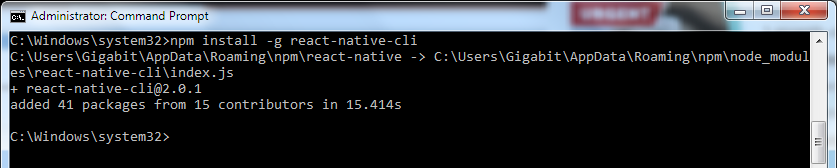
5. Node comes with npm (Node Package Manager), which lets you install the React Native. Run the given code:

  1. npm install -g react-native-cli  

React Native Environment Setup

Setup Android Studio

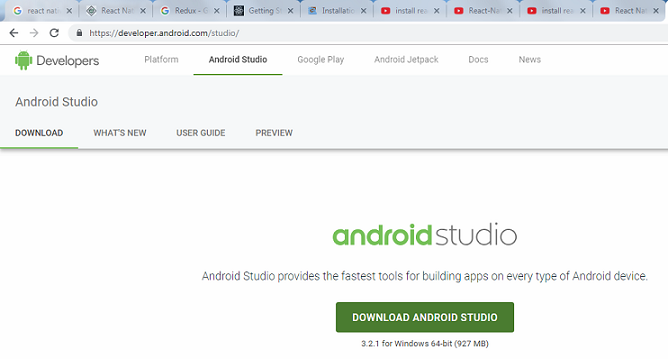
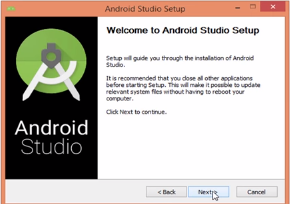
1. Visit Android website and download Android Studio.

React Native Environment Setup

2. Run the downloaded android studio set (.exe) file and follow the instruction.


React Native Environment Setup

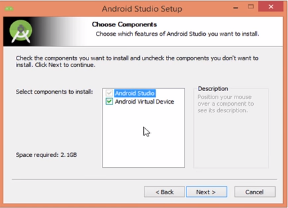
3. Choose the feature you want to install.

React Native Environment Setup

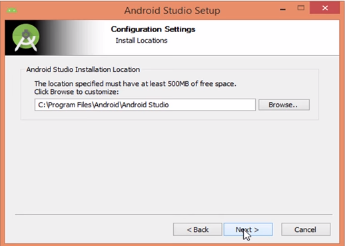
4. Select the installation location.

React Native Environment Setup

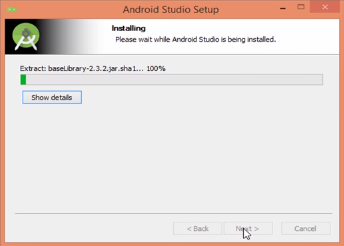
5. Let the installation proceed and click Next.

React Native Environment Setup

6. Click Finish to complete the installation.

React Native Environment Setup

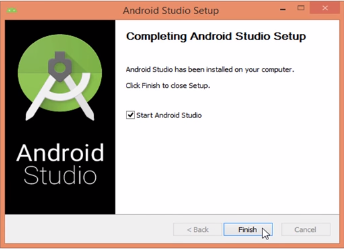
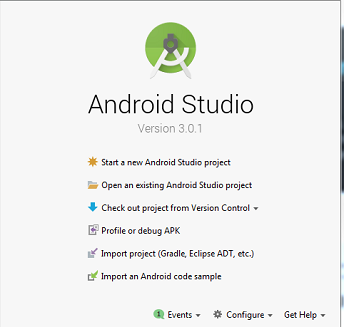
After successful installation, the Android Studio home screen will appear.

React Native Environment Setup

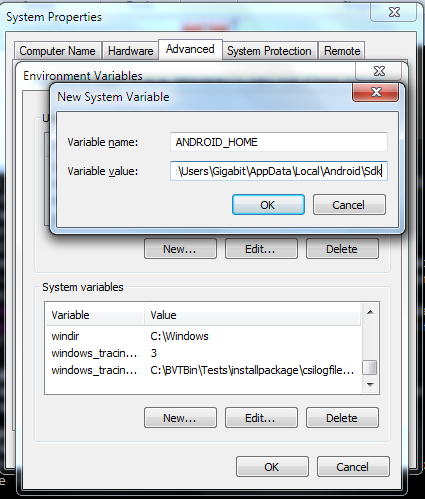
Setup Java JDK and Android SDK path

1. Visit How to set path in Java to set JDK path.

2. Set Android SDK path as My Computer > Properties > Advance system settings > Environment Variables > in System variables section. Click "New..." add Android home and Android SDK as bellow screen.

React Native Environment Setup

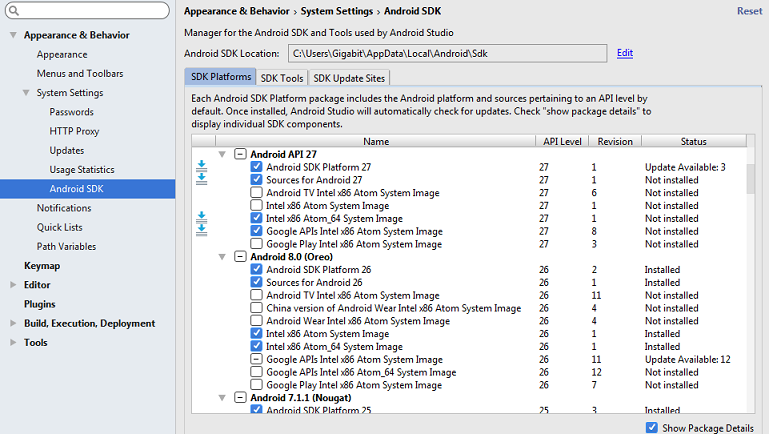
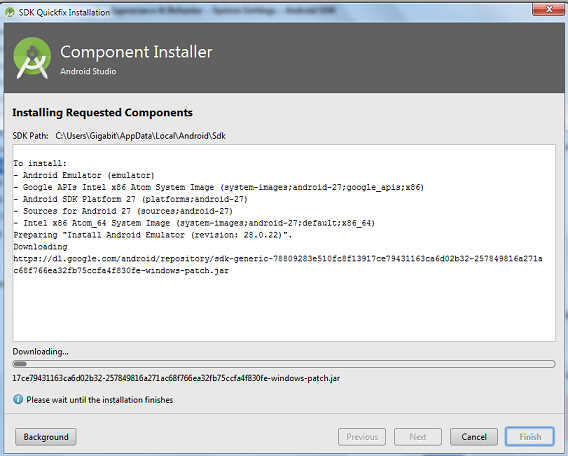
3. Install the required components, go to Tools Android > SDK Manager > SDK platforms and select the required components and install.

React Native Environment Setup

4. Let the installation proceed and after successfully installation, click Finish.

React Native Environment Setup

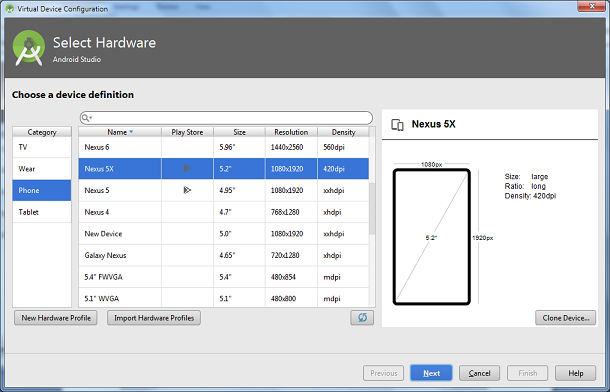
5. Create Android Emulator, a virtual Android Device, go to Tools > Android > AVD Manager > Create Virtual Device... SDK platforms and select the device type.

React Native Environment Setup

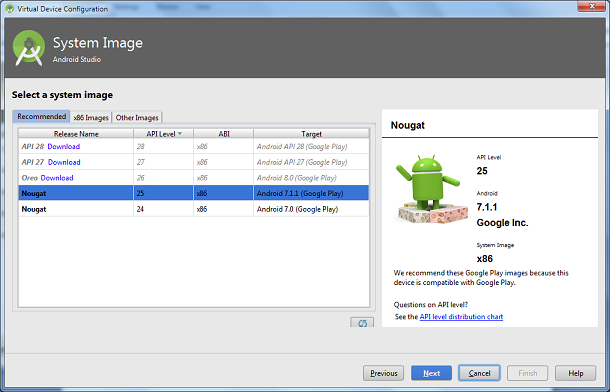
6. Select API level of Android Emulator.

React Native Environment Setup

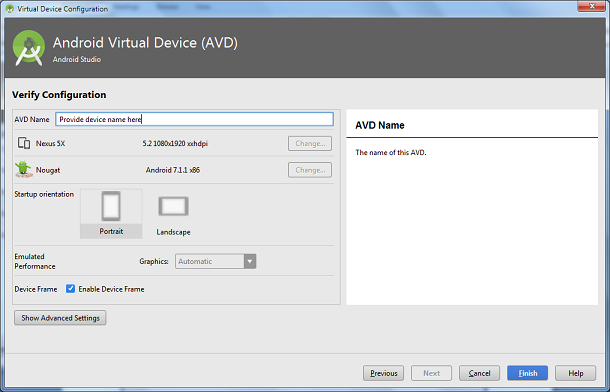
7. Provide device name and set properties by clicking Show Advance Settings.

React Native Environment Setup

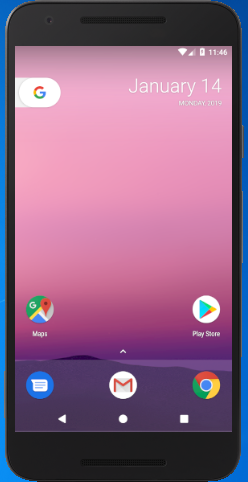
8. Launch the Emulator.

React Native Environment Setup

Comments

Popular Posts

How I Reduced the Size of My React Native App by 85%

How and Why You Should Do It I borrowed 25$ from my friend to start a Play Store Developer account to put up my first app. I had already created the app, created the assets and published it in the store. Nobody wants to download a todo list app that costs 25mb of bandwidth and another 25 MB of storage space. So today I am going to share with you how I reduced the size of Tet from 25 MB to around 3.5 MB. Size Matters Like any beginner, I wrote my app using Expo, the awesome React Native platform that makes creating native apps a breeze. There is no native setup, you write javascript and Expo builds the binaries for you. I love everything about Expo except the size of the binaries. Each binary weighs around 25 MB regardless of your app. So the first thing I did was to migrate my existing Expo app to React Native. Migrating to React Native react-native init  a new project with the same name Copy the  source  files over from Expo project Install all de...

How to recover data of your Android KeyStore?

These methods can save you by recovering Key Alias and Key Password and KeyStore Password. This dialog becomes trouble to you? You should always keep the keystore file safe as you will not be able to update your previously uploaded APKs on PlayStore. It always need same keystore file for every version releases. But it’s even worse when you have KeyStore file and you forget any credentials shown in above box. But Good thing is you can recover them with certain tricks [Yes, there are always ways]. So let’s get straight to those ways. 1. Check your log files → For  windows  users, Go to windows file explorer C://Users/your PC name/.AndroidStudio1.4 ( your android studio version )\system\log\idea.log.1 ( or any old log number ) Open your log file in Notepad++ or Any text editor, and search for: android.injected.signing and if you are lucky enough then you will start seeing these. Pandroid.injected.signing.store.file = This is  file path where t...

React Native - Text Input

In this chapter, we will show you how to work with  TextInput  elements in React Native. The Home component will import and render inputs. App.js import React from 'react' ; import Inputs from './inputs.js' const App = () => { return ( < Inputs /> ) } export default App Inputs We will define the initial state. After defining the initial state, we will create the  handleEmail  and the  handlePassword  functions. These functions are used for updating state. The  login()  function will just alert the current value of the state. We will also add some other properties to text inputs to disable auto capitalisation, remove the bottom border on Android devices and set a placeholder. inputs.js import React , { Component } from 'react' import { View , Text , TouchableOpacity , TextInput , StyleSheet } from 'react-native' class Inputs extends Component { state = { ...