The Geolocation API is used to get the geographical position (latitude and longitude) of a place. It extends the Geolocation web specification. This API is available through the navigator.geolocation globally, so that we do not need to import it.
In Android, Geolocation API uses android.location API. However, this API is not recommended by Google because it is less accurate, and slower than the recommended Google Location Services API. To use the Google Location Services API in React Native, use the react-native-geolocation-service module.
React Native Configuration and Permissions
In this section, we discuss the project which is created using react-native init or with expo init or Create React Native App.
iOS
For iOS platform we include the NSLocationWhenInUseUsageDescription key in Info.plist to enable geolocation. Geolocation is by default enabled when a project is created with react-native init.
To enable the geolocation in background, we need to include the 'NSLocationAlwaysUsageDescription' key in Info.plist. This requires adding location as a background mode in the 'Capabilities' tab in Xcode.
Android
To access the location in Android, we need to add <uses-permission android:name="android.permission.ACCESS_FINE_LOCATION" /> in AndroidManifest.xml file.
The Android API >=23 requires to request the ACCESS_FINE_LOCATION permission using the PermissionsAndroid API.
Methods of Geolocation
| Method | Description |
|---|---|
| getCurrentPosition() | It invokes the success callback once with latest location information. |
| watchPosition() | It invokes the success callback whenever the location changes. It returns a watchId (number). |
| clearWatch() | It clears the watchId of watchPosition(). |
| stopObserving() | It stops observing for device location changes as well as it removes all listeners previously registered. |
| setRNConfiguration() | It sets the configuration options, which is used in all location requests. |
| requestAuthorization() | It requests suitable Location permission based on the key configured on pList. |
React Native Geolocation Example
App.js
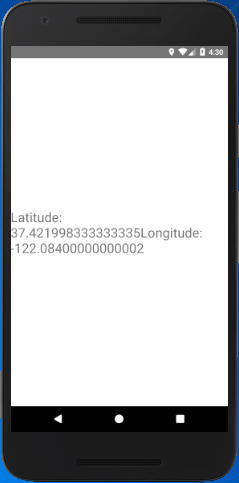
Output:
Comments
Post a Comment
Thank You.