React Native ListView is a view component which contains the list of items and displays in a vertical scrollable list. The minimum API to create list view is ListView.DataSource. It populates a simple array of data blobs, and instantiate a ListView component with data source and a renderRow callback. The renderRow takes a blob from data array and returns a renderable component.
Note: The ListView component has deprecated. To implement the list component use new list components FlatList or SectionList.
React Native ListView Example 1
Let's create an example of ListView component. In this example, we create a data source, and fill it with an array of data blobs. Create a ListView component using that array as its data source, and pass it in its renderRow callback. The renderRow is a function which returns a component which renders the row.
- import React, { Component } from 'react'
- import { Text, ListView, StyleSheet } from 'react-native'
-
- export default class MyListComponent extends Component {
- constructor() {
- super();
- const ds = new ListView.DataSource({rowHasChanged: (r1, r2) => r1 !== r2});
- this.state = {
- dataSource: ds.cloneWithRows(['Android','iOS', 'Java','Php', 'Hadoop',
- 'Sap', 'Python','Ajax', 'C++',
- 'Ruby', 'Rails','.Net', 'Perl']),
- };
- }
-
- render() {
- return (
- <ListView
- dataSource={this.state.dataSource}
- renderRow={
- (rowData) =>
- <Text style={{fontSize: 20}}>{rowData}</Text>}
- />
- );
- }
- }
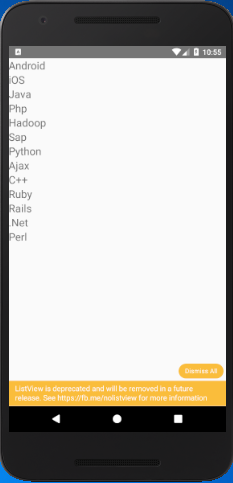
Output:
In the above code, we create an instance of ListViewDataSource in the constructor. The ListViewDataSource is a parameter and accept an argument which contain any of these four:
- getRowData(dataBlob, sectionID, rowID)
- getSectionHeaderData(dataBlob, sectionID)
- rowHasChanged(previousRowData, nextRowData)
- sectionHeaderHasChanged(previousSectionData, nextSectionData)
Add separation and perform action on ListView items
Separation is added to provide a separate block and for better display of list items. The props renderSeparator is used to add separator among the items (data) of ListView.
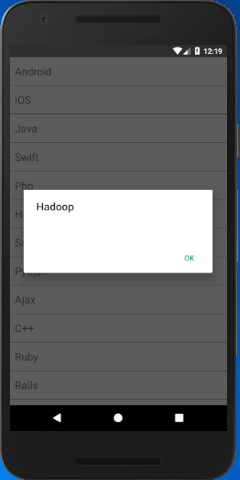
Implement onPress props over Text to perform an action on clicking the list items. Here, we generate an alert message and display the list items on which a user click.
- import React from 'react';
- import { View, ListView, StyleSheet, Text,Alert} from 'react-native';
-
- class ListViewDemo extends React.Component {
- constructor(props) {
- super(props);
-
- const ds = new ListView.DataSource({rowHasChanged: (r1, r2) => r1 !== r2});
- this.state = {
- dataSource: ds.cloneWithRows([ "Android",
- "iOS","Java","Swift",
- "Php","Hadoop","Sap",
- "Python","Ajax", "C++",
- "Ruby", "Rails",".Net",
- "Perl",
- ])
- };
- }
-
- getListViewItem = (rowData) => {
- Alert.alert(rowData);
- }
- render() {
- return (
- <ListView
- style={styles.container}
- dataSource={this.state.dataSource}
- renderRow={(rowData) =>
- <Text style={styles.rowViewContainer}
- onPress={this.getListViewItem.bind(this, rowData)}>{rowData}
- </Text>
- }
- renderSeparator={(sectionId, rowId) =>
- <View key={rowId} style={styles.separator} />}
- />
- );
- }
- }
-
- const styles = StyleSheet.create({
- container: {
- flex: 1,
- backgroundColor: "#e5e5e5"
- },
- separator: {
- height: 0.5, width: "100%", backgroundColor: "#000"
- },
- rowViewContainer: {
- flex: 1,
- paddingRight: 15,
- paddingTop: 13,
- paddingBottom: 13,
- borderBottomWidth: 0.5,
- borderColor: '#c9c9c9',
- flexDirection: 'row',
- alignItems: 'center',
- fontSize: 20,
- marginLeft: 10,
- },
- });
-
- export default ListViewDemo;
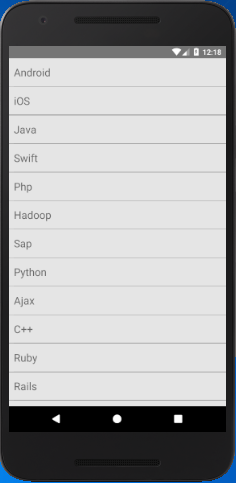
Output:
Really Impressive.
ReplyDeleteRead all the details with the sample code that you mentioned in the blog regarding list view in React Native. After checking all the data I believe that nothing could be more expressive then this blog.
I was searching for the best react native development company and got your blog.
Thanks for sharing for such a great blog.