Password Autofill

As a user, we have many applications installed on our devices and most of them have a login feature.
Logging in is the first step that a user has to take when they start with an app that requires an account. This usually takes a couple of seconds if the user remembers their credentials and is able to type them right away. Many users, instead, use the password manager service like iCloud Keychain, 1Password, LastPass, NortonIDSafe etc. and copy their username and password.
Many of the applications have the same username and password as we use the email address as our login name and to keep it simple to remember the password we usually have a tendency to have the same password for more than one application or we have set of passwords which we use for all the application for example.
Username: santosh@gmail.com
FB Password: P@ssword
Email Password: P@ssword
I know, every account should have unique/different password, security loophole, risky and blah… blah… blah…
It is what it is. 🙄 🙄 🙄
Now the point is what to do now?
Apple has introduced a very basic but important feature at WWDC 2017 that many of us wanted to have.
In iOS 11, Apple has introduced a seamless way to streamline the login process with the new Password AutoFill API.
This is a very easy and faster way for users to login and developers to implement for their applications.
In this blog, we will be going through a step by step to have it in our application.
Preparing your App for AutoFill
There are two scenarios which we can handle to use the AutoFill in our application.
- QuickType bar just above the keyboard with the key symbol.
- Link our website and application which will directly show the exact user name and password combination for your application.
Let’s walk through both the scenarios one by one.
# QuickType Bar
Showing the password button is as simple as changing one setting on your text fields.
userNameTextField?.textContentType = .username
passwordTextField?.textContentType = .password
That’s it, and you are done.
Run your application and tap on the userNameTextField or passwordTextField it will show you the keyboard.

Wait, there is simple change when you see the keyboard now compare to the keyboard which you were using previously.
🔑 at right top of the keyboard.
Tap on 🔑.

It will present a list of username & passwords available in the default password manager.

Tap on any one of them and it will auto fill your username and password text field.

NOTE: I kept the password field as a plain text field intentionally.
Feeling great, right? Wait a minute. What if you want to sign up? Only username & password will not suffice your needs.
UITextContentType has many other semantic meanings expected for a text field like from iOS 10.
emailAddress, countryName, creditCardNumber and many more.
Get the entire list here.
UITextContentType like username & password are introduced in IOS 11.
Our applications will get the list of username & password combinations, but from where?
🤔 🤔 🤔 Good question.
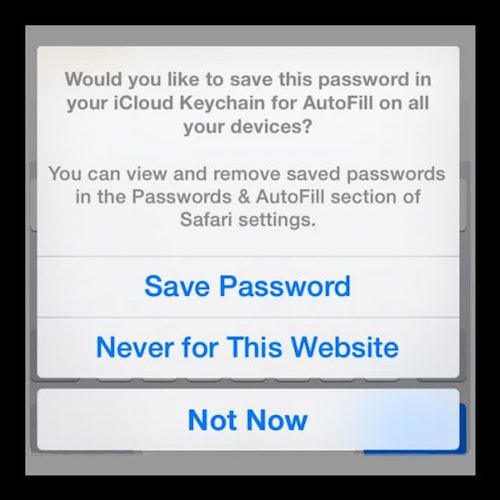
iOS and Mac OS have a password manager inbuilt and integrated in Safari.
Whenever user login to any site using Safari it prompts user for saving a password.
I understand, in the above scenario it shows all the username/password combination to fill in.
But, I am very sure that, user has logged into my site and has saved the credentials in the safari password manager?
That means, instead of showing list of username/password can my application show my site/app specific username & password. User just tap on key and we are done.
YES, We can do this.
😊 😊 😊 Thanks to Apple.
# Associating your specific app password
In iOS 11, application & sites can have the association.
Let’s understand how to do the association of application and website.
To establish the association between our application and our website we require a file called apple-app-site-association.
It might be familiar to you, If you have supported the deep-linking or universal linking to iOS users can tap a link to your website and get seamlessly redirected to your installed app without going through Safari. If your app isn’t installed, tapping a link to your website opens your website in Safari.
If not, don’t worry. It’s not required here.
If your app doesn’t have deep-linking, you’ll need to enable Associated Domains in your Xcode project.
Switch to your Xcode project settings, go to the Capabilities tab, and turn on Associated Domains.

Add your website URL here. Let’s say your website domain name is santoshbotre.com: the listed domain name should be,
webcredentials:santoshbotre.com
webcredentials:[listed_domain_name]
You can have multiple domain association for your application.
On you server, add an apple-app-site-association file, or extend your current one, if present. It should contain a webcredentials section that specifies your app.
Here’s an example:
{
"webcredentials": {
"apps": [A6411SB83A.com.santoshbo.PasswordAutoFill]
}
}
A6411SB83A.com.santoshbo.PasswordAutoFill is application bundle id.
Apple recommends adding this file to the /.well-known directory, but you may also use the root. The full path will look like this:
Your application is ready for AutoFill will association with your site. Isn’t it simple.
Build and run your app on a device running iOS 11 (this functionality is not available in the simulator).
You will able to see the,

If you want to know more about Password AutoFill, check out Session 206 at WWDC 2017
Comments
Post a Comment
Thank You.