In this chapter, we will show you how to work with TextInput elements in React Native.
The Home component will import and render inputs.
App.js
import React from 'react';
import Inputs from './inputs.js'

const App = () => {
   return (
      <Inputs />
   )
}
export default App
Inputs
We will define the initial state.
After defining the initial state, we will create the handleEmail and the handlePassword functions. These functions are used for updating state.
The login() function will just alert the current value of the state.
We will also add some other properties to text inputs to disable auto capitalisation, remove the bottom border on Android devices and set a placeholder.
inputs.js
import React, { Component } from 'react'
import { View, Text, TouchableOpacity, TextInput, StyleSheet } from 'react-native'

class Inputs extends Component {
   state = {
      email: '',
      password: ''
   }
   handleEmail = (text) => {
      this.setState({ email: text })
   }
   handlePassword = (text) => {
      this.setState({ password: text })
   }
   login = (email, pass) => {
      alert('email: ' + email + ' password: ' + pass)
   }
   render() {
      return (
         <View style = {styles.container}>
            <TextInput style = {styles.input}
               underlineColorAndroid = "transparent"
               placeholder = "Email"
               placeholderTextColor = "#9a73ef"
               autoCapitalize = "none"
               onChangeText = {this.handleEmail}/>

            <TextInput style = {styles.input}
               underlineColorAndroid = "transparent"
               placeholder = "Password"
               placeholderTextColor = "#9a73ef"
               autoCapitalize = "none"
               onChangeText = {this.handlePassword}/>

            <TouchableOpacity
               style = {styles.submitButton}
               onPress = {
                  () => this.login(this.state.email, this.state.password)
               }>
               <Text style = {styles.submitButtonText}> Submit </Text>
            </TouchableOpacity>
         </View>
      )
   }
}
export default Inputs

const styles = StyleSheet.create({
   container: {
      paddingTop: 23
   },
   input: {
      margin: 15,
      height: 40,
      borderColor: '#7a42f4',
      borderWidth: 1
   },
   submitButton: {
      backgroundColor: '#7a42f4',
      padding: 10,
      margin: 15,
      height: 40,
   },
   submitButtonText:{
      color: 'white'
   }
})
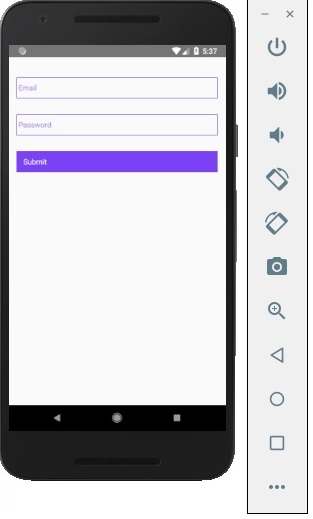
Whenever we type in one of the input fields, the state will be updated. When we click on the Submit button, text from inputs will be shown inside the dialog box.
Whenever we type in one of the input fields, the state will be updated. When we click on the Submit button, text from inputs will be shown inside the dialog box.

Comments
Post a Comment
Thank You.