
React Native Animation

React Native Animations provide an extra effect and great user experience in the app. Animations convey physically believable motion in your interface.
There are two types of complementary animation systems in React Native. These are:
  • Animated: The Animated API is used to interactive control the specific values. It focuses on declarative relationships between inputs and outputs. It has a start and stop methods to control the time-based animation execution.
  • Animated exports four different animated components as View, Text, Image and ScrollView. We can also create our own animated component using Animated.createAnimatedComponent().
  • LayoutAnimated: The LayoutAnimated is used to animate the global layout transactions.
  • Animated Methods

    MethodsDescription
    Animated.timing()It animates a value over time using various easing curve, or by using own function.
    Animated.event()It maps event directly to animated values.
    Animated.spring()It animate the valueIt tracks the velocity of state to create fluid motion as toValue updates.
    Animated.decay()It starts the animations with initial velocity and gradually goes slows to stop.

    React Native Animation Example 1 (Animated.timing())

    In this example, we will create a spinning animation on image using Animated.timing().

    App.js

    1. import React, { Component } from 'react';  
    2. import {StyleSheet, AppRegistry,Text, View,Animated,Easing} from 'react-native';  
    3.   
    4. export default class DisplayAnImage extends Component {  
    5.     constructor () {  
    6.         super()  
    7.         this.spinValue = new Animated.Value(0)//declare spinValue as a new Animated.Value and pass 0 (zero) in it.  
    8.     }  
    9.     componentDidMount () {  
    10.         this.spin()  
    11.     }  
    12.     //create a spin method and call it from componentDidMount  
    13.     spin () {  
    14.         this.spinValue.setValue(0//set spinValue to 0 (zero)  
    15.         Animated.timing(    //calling Animated.timing() method, it takes two arguments:  
    16.             this.spinValue, // value  
    17.             {           // and config object  
    18.                 toValue: 1//and setting spinValue to 1  
    19.                 duration: 4000//within 4000 milliseconds  
    20.                 easing: Easing.linear  
    21.             }  
    22.         ).start(() => this.spin())  
    23.     }  
    24.     render () {  
    25.         const spin = this.spinValue.interpolate({  
    26.             inputRange: [01],  
    27.             outputRange: ['0deg''360deg']  
    28.         })  
    29.         return (  
    30.             <View style={styles.container}>  
    31.                 <Animated.Image  
    32.                     style={{  
    33.                         width: 227,  
    34.                         height: 200,  
    35.                         transform: [{rotate: spin}] }}  
    36.                     source={require('MyReactNativeApp/img/react-logo.png')}  
    37.                 />  
    38.             </View>  
    39.         )  
    40.     }  
    41. }  
    42. const styles = StyleSheet.create({  
    43.     container: {  
    44.         flex: 1,  
    45.         justifyContent: 'center',  
    46.         alignItems: 'center'  
    47.     }  
    48. })  
    49. // skip this line if you are using Create React Native App  
    50.   
    51. AppRegistry.registerComponent('DisplayAnImage', () => DisplayAnImage);  
    The interpolate() method call any Animated.Value. It interpolates the value before updating the property. In above example, we map 0 (zero) degrees to 360 degrees.
    We pass an inputRange [0,1] and get the outputRange['0deg', '360deg'] array.

    Output:

    React Native Animation

    React Native Animation Example 2 (Animated.timing())

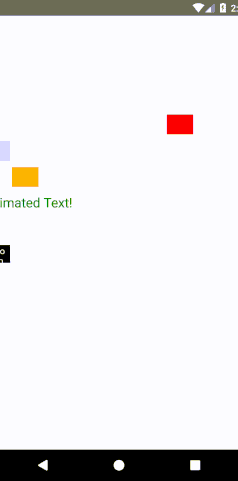
    In this example, we declare a single animated value this.aninatedValue and use it with interpolate to create multiple animations, such as: marginLeft, opacity, fontSize, and rotate. We will interpolate these properties for styling such as opacity, margins, text sizes, and rotation properties.

    App.js

    1. import React, { Component } from 'react';  
    2. import {StyleSheet, AppRegistry,Text, View,Animated,Easing} from 'react-native';  
    3.   
    4. export default class DisplayAnImage extends Component {  
    5.     constructor () {  
    6.         super()  
    7.         this.animatedValue = new Animated.Value(0)  
    8.     }  
    9.     componentDidMount () {  
    10.         this.animate()  
    11.     }//animate method is call from componentDidMount  
    12.     animate () {  
    13.         this.animatedValue.setValue(0)  
    14.         Animated.timing(  
    15.             this.animatedValue,  
    16.             {  
    17.                 toValue: 1,  
    18.                 duration: 2000,  
    19.                 easing: Easing.linear  
    20.             }  
    21.         ).start(() => this.animate())  
    22.     }  
    23.   
    24.     render() {  
    25.         const marginLeft = this.animatedValue.interpolate({  
    26.             inputRange: [01],  
    27.             outputRange: [0300]  
    28.         })  
    29.         const opacity = this.animatedValue.interpolate({  
    30.             inputRange: [00.51],  
    31.             outputRange: [010]  
    32.         })  
    33.         const movingMargin = this.animatedValue.interpolate({  
    34.             inputRange: [00.51],  
    35.             outputRange: [03000]  
    36.         })  
    37.         const textSize = this.animatedValue.interpolate({  
    38.             inputRange: [00.51],  
    39.             outputRange: [183218]  
    40.         })  
    41.         const rotateX = this.animatedValue.interpolate({  
    42.             inputRange: [00.51],  
    43.             outputRange: ['0deg''180deg''0deg']  
    44.         })  
    45.   
    46.   
    47.         return (  
    48.             <View style={styles.container}>  
    49.                 <Animated.View //returns Animated.View  
    50.                     style={{  
    51.                         marginLeft,  
    52.                         height: 30,  
    53.                         width: 40,  
    54.                         backgroundColor: 'red'}} />  
    55.                 <Animated.View  
    56.                     style={{  
    57.                         opacity,  
    58.                         marginTop: 10,  
    59.                         height: 30,  
    60.                         width: 40,  
    61.                         backgroundColor: 'blue'}} />  
    62.                 <Animated.View  
    63.                     style={{  
    64.                         marginLeft: movingMargin,  
    65.                         marginTop: 10,  
    66.                         height: 30,  
    67.                         width: 40,  
    68.                         backgroundColor: 'orange'}} />  
    69.                 <Animated.Text // returns Animated.Text  
    70.                     style={{  
    71.                         fontSize: textSize,  
    72.                         marginTop: 10,  
    73.                         color: 'green'}} >  
    74.                     Animated Text!  
    75.                 </Animated.Text>  
    76.                 <Animated.View   
    77.                     style={{  
    78.                         transform: [{rotateX}],  
    79.                         marginTop: 50,  
    80.                         height: 30,  
    81.                         width: 40,  
    82.                         backgroundColor: 'black'}}>  
    83.                     <Text style={{color: 'white'}}>Hello from TransformX</Text>  
    84.                 </Animated.View>  
    85.             </View>  
    86.         )  
    87.     }  
    88. }  
    89. const styles = StyleSheet.create({  
    90.     container: {  
    91.         flex: 1,  
    92.         paddingTop: 150  
    93.     }  
    94. })   
    95. // skip this line if you are using Create React Native App  
    96. AppRegistry.registerComponent('DisplayAnImage', () => DisplayAnImage);  


    Output:

    React Native Animation

    LayoutAnimation API

    LayoutAnimation allow to globally configure, create, and update animations. This will be used for all views in the next render/layout cycle.
    The LayoutAnimation is quite useful, it has much less control than Animated and other animation libraries.

    To use this API in Android we need to set the following flags via UIManager:

    1. UIManager.setLayoutAnimationEnabledExperimental &&  
    2.   UIManager.setLayoutAnimationEnabledExperimental(true);  

    React Native LayoutAnimation Example

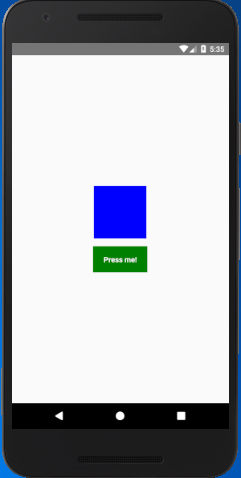
    In this example, we create a TouchableOpacity and a View component. On pressing the TouchableOpacity component calls the _onPress() method and it animates the View component by increases width and height of View by 15 unit.

    1. import React from 'react';  
    2. import {  
    3.     NativeModules,  
    4.     LayoutAnimation,  
    5.     Text,  
    6.     TouchableOpacity,  
    7.     StyleSheet,  
    8.     View,  
    9. } from 'react-native';  
    10.   
    11. const { UIManager } = NativeModules;  
    12.   
    13. UIManager.setLayoutAnimationEnabledExperimental &&  
    14. UIManager.setLayoutAnimationEnabledExperimental(true);  
    15.   
    16. export default class App extends React.Component {  
    17.     state = {  
    18.         w: 100,  
    19.         h: 100,  
    20.     };  
    21.   
    22.     _onPress = () => {  
    23.         // Animate the update  
    24.         LayoutAnimation.spring();  
    25.         this.setState({w: this.state.w + 15, h: this.state.h + 15})  
    26.     }  
    27.   
    28.     render() {  
    29.         return (  
    30.             <View style={styles.container}>  
    31.                 <View style={[styles.box, {width: this.state.w, height: this.state.h}]} />  
    32.                 <TouchableOpacity onPress={this._onPress}>  
    33.                     <View style={styles.button}>  
    34.                         <Text style={styles.buttonText}>Press me!</Text>  
    35.                     </View>  
    36.                 </TouchableOpacity>  
    37.             </View>  
    38.         );  
    39.     }  
    40. }  
    41.   
    42. const styles = StyleSheet.create({  
    43.     container: {  
    44.         flex: 1,  
    45.         alignItems: 'center',  
    46.         justifyContent: 'center',  
    47.     },  
    48.     box: {  
    49.         width: 200,  
    50.         height: 200,  
    51.         backgroundColor: 'blue',  
    52.     },  
    53.     button: {  
    54.         backgroundColor: 'green',  
    55.         paddingHorizontal: 20,  
    56.         paddingVertical: 15,  
    57.         marginTop: 15,  
    58.     },  
    59.     buttonText: {  
    60.         color: '#fff',  
    61.         fontWeight: 'bold',  
    62.     },  
    63. });  


    Output:

    React Native Animation React Native Animation

Comments

Popular Posts

How I Reduced the Size of My React Native App by 85%

How and Why You Should Do It I borrowed 25$ from my friend to start a Play Store Developer account to put up my first app. I had already created the app, created the assets and published it in the store. Nobody wants to download a todo list app that costs 25mb of bandwidth and another 25 MB of storage space. So today I am going to share with you how I reduced the size of Tet from 25 MB to around 3.5 MB. Size Matters Like any beginner, I wrote my app using Expo, the awesome React Native platform that makes creating native apps a breeze. There is no native setup, you write javascript and Expo builds the binaries for you. I love everything about Expo except the size of the binaries. Each binary weighs around 25 MB regardless of your app. So the first thing I did was to migrate my existing Expo app to React Native. Migrating to React Native react-native init  a new project with the same name Copy the  source  files over from Expo project Install all de...

How to recover data of your Android KeyStore?

These methods can save you by recovering Key Alias and Key Password and KeyStore Password. This dialog becomes trouble to you? You should always keep the keystore file safe as you will not be able to update your previously uploaded APKs on PlayStore. It always need same keystore file for every version releases. But it’s even worse when you have KeyStore file and you forget any credentials shown in above box. But Good thing is you can recover them with certain tricks [Yes, there are always ways]. So let’s get straight to those ways. 1. Check your log files → For  windows  users, Go to windows file explorer C://Users/your PC name/.AndroidStudio1.4 ( your android studio version )\system\log\idea.log.1 ( or any old log number ) Open your log file in Notepad++ or Any text editor, and search for: android.injected.signing and if you are lucky enough then you will start seeing these. Pandroid.injected.signing.store.file = This is  file path where t...

React Native - Text Input

In this chapter, we will show you how to work with  TextInput  elements in React Native. The Home component will import and render inputs. App.js import React from 'react' ; import Inputs from './inputs.js' const App = () => { return ( < Inputs /> ) } export default App Inputs We will define the initial state. After defining the initial state, we will create the  handleEmail  and the  handlePassword  functions. These functions are used for updating state. The  login()  function will just alert the current value of the state. We will also add some other properties to text inputs to disable auto capitalisation, remove the bottom border on Android devices and set a placeholder. inputs.js import React , { Component } from 'react' import { View , Text , TouchableOpacity , TextInput , StyleSheet } from 'react-native' class Inputs extends Component { state = { ...