Creating a Chatbot and Translation app with Nextjs and React Native using ChatGPT (OpenAI)
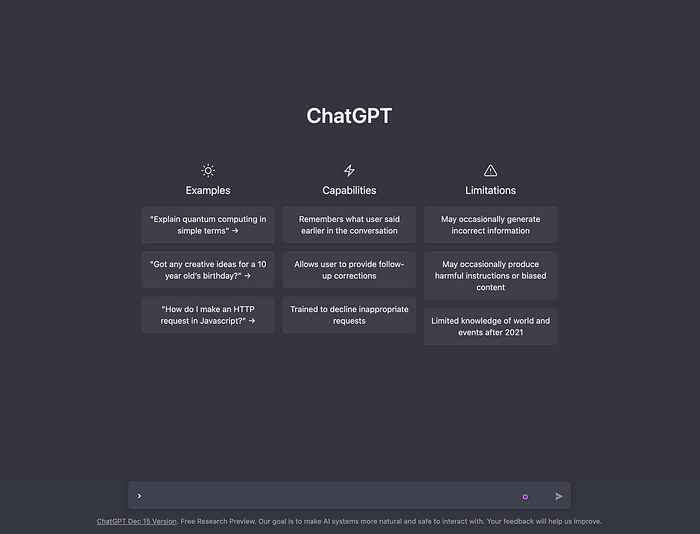
What is ChatGPT?
I asked the same question on Chat-GPT , and here’s what it said.
ChatGPT is a chatbot model developed by OpenAI that is based on the GPT (Generative Pre-trained Transformer) language model. It is designed to generate human-like responses to text input in a conversational context. ChatGPT uses a combination of machine learning and natural language processing techniques to generate appropriate responses to user input in a way that resembles human conversation.
The ChatGPT model is trained on a large dataset of human conversations, and it is able to generate responses that are coherent, contextually relevant, and often quite similar to those that a human might provide in a similar conversational context. ChatGPT is able to maintain a consistent persona or “character” throughout a conversation, and it can also generate responses to a wide range of topics and content types.
ChatGPT can be used to build chatbots or conversational agents that can engage with users in a variety of settings, including customer service, e-commerce, social media, and more. It is also a useful tool for researchers and developers working on natural language processing and chatbot technology. — From ChatGPT
As you can see, it is very accurate in answering.
In this article, we will see how we can use OpenAI’s API to incorporate ChatGPT into a React Native application to create a Chatbot and text translation app.
Creating the ServerSide with Nextjs
To utilize ChatGPT in react native, which will be our client side we first need to create a server. The server will have two REST API endpoints ask-a-question and translate . The first endpoint will take in a param called question in the request body and return an answer to question which we will query from the OpenAI’s createCompletion method. The second endpoint will be translate which will take two params query and language . The first param query will store the text which user wants to translate and the second is language which is the desired language user needs to translate into.
Okay, enough talk; Now let’s start to code.
You can find the code in this repository.
To create a new Nextjs project head to your terminal and type the following command.
npx create-next-app@latest

OR Add a typescript flag to create in typescipt

npx create-next-app@latest --typescript
You will be prompted with what name you want to give to your project, enter what you want, and proceed.
After your project is created open the project folder in your preferred Code Editor.
To test run the app, execute the following:
yarn dev

OR

npm run dev

OR

next dev
Once your app is running you can view it on http://localhost:3000/
We need to create two API endpoints so we will not touch anything else in the pages folder other than the api folder.
Nextjs treats files under this folder as API endpoints, let’s create our first endpoint.
Create a new file name ask-a-question.ts inside pages/api .
Before we write code in this file, we first need to install openai into our project.
Run the below command to install openai dependency into your project using any package manager.
yarn add openai

OR

npm i openai
Now let’s use it.
We will create a common file that will configure the OpenAiApi
Create a new folder at the root of the project and add a file name config.ts inside it.
mkdir src && touch config.tsNow add the following code inside this file:
import { Configuration, OpenAIApi } from "openai";

const config = new Configuration({
    apiKey: process.env.OPEN_AI_KEY
});

const openAI = new OpenAIApi(config);

export default openAI;
Also, we need to add the OPEN_AI_KEY in .env file.
touch .envNow you need to create an API Key for using Open AI’s API, follow this link to do so.
Log in to their website and create your API-KEY.
NOTE: You cannot use Open AI API without
apiKey
We will now add the code to handle ask-a-question endpoint, add the below code in ask-a-question.ts file.
import type { NextApiRequest, NextApiResponse } from "next";
import openAI from "../../src/config";

type Data = {
  result?: string | undefined;
  error?: string;
};

export default async function handler(
  req: NextApiRequest,
  res: NextApiResponse<Data>
) {
  if (!req?.body?.question){
    res.status(400).json({ error: 'Invalid params' })
  }

  const completion = await openAI.createCompletion({
    model: 'text-davinci-003',
    prompt: req?.body?.question,
    temperature: 0.8,
    max_tokens: 2048,
  });
  res.status(200).json({ result: completion.data?.choices?.[0]?.text });
}
In the above code first, we are checking if request has a valid question parameter value, if not then returning 400 with error message Invalid params . If we get the params correctly then are calling openAI.createCompletion the method which calls the openai API under the hood with the given prompt and specified model and other options.
We are passing the question which we receive in the request body to the API then weawait until it returns. Then we simply return the answer in the response .
The output will be as below:
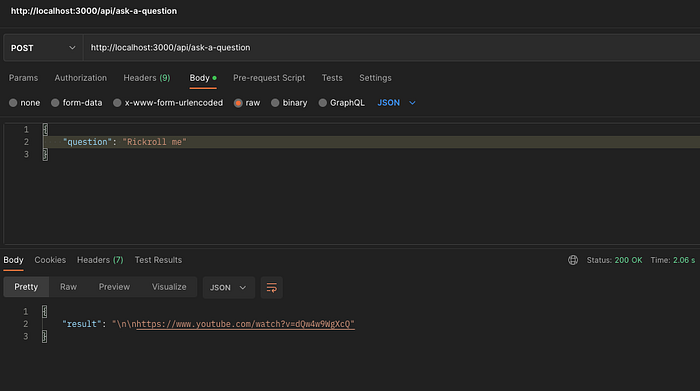
Now let’s create the second endpoint i.e. for translation.
Create another file in pages/api and name it translate.ts , then add the following code inside.
import type { NextApiRequest, NextApiResponse } from "next";
import openAI from "../../src/config";

type Data = {
  result?: string | undefined;
  error?: string;
};

export default async function handler(
  req: NextApiRequest,
  res: NextApiResponse<Data>
) {
  if (!req?.body?.query || !req?.body?.language) {
    res.status(400).json({ error: "Invalid params" });
  }

  const { query = "", language = "English" } = req?.body;
  const completion = await openAI.createCompletion({
    model: "text-davinci-003",
    // We are prompting the API in the below format
    // The ?? after `query` is just a HACK
    prompt: `translate ${query}?? in ${language}`,
    temperature: 0.8,
    max_tokens: 2048,
  });
  res.status(200).json({ result: completion.data?.choices?.[0]?.text });
}
That’s it, we have created two endpoints using Chat-GPT to answer anything.
The output of the above will be:
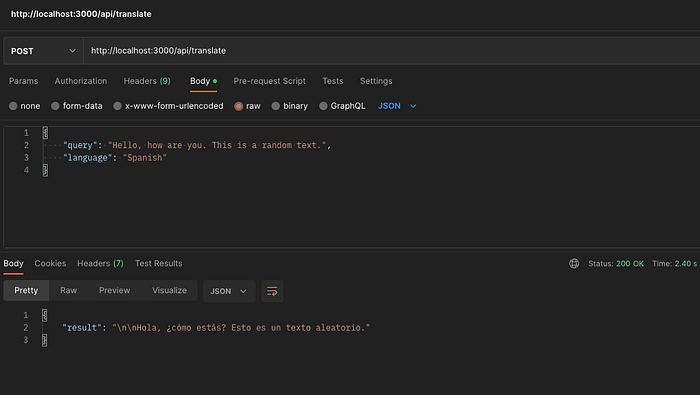
Yay 🔥 we have completed our application’s Backend.
You can deploy this using Vercel, it is very easy and fast.
Creating Application with React Native
Now let’s create an mobile app to utilize this back end we just created.
If you want to skip the code, here is the repository URL. You also need to download the assets folder from the repo.
We will use React Native to create the mobile app for iOS and Android. Get started by creating a new react native project.
npx react-native init <your-project-name> --template react-native-template-typescriptonce project is created, run it on iOS simulator and Android emulator using the below commands
yarn ios
yarn android
  OR
react-native run-android
react-native run-ios
Now you should have a React Native app running on your simulators.
Before we start to write our code, let’s remove the starter code App.tsx file and add the following.
import React, {useState} from 'react';
import {View, Text, StyleSheet, Image, Pressable, TextInput} from 'react-native';

const App: React.FC = () => (
  <View style={styles.container}>
    <Text>Hello React Native!</Text>
  </View>
);

const styles = StyleSheet.create({
  container: {
    flex: 1,
    justifyContent: 'center',
    alignItems: 'center',
  },
});

export default App;
Now you must see a white screen with text Hello React Native! at the center.
We will now write the code to display a tab bar on app screen, the tab bar will have two options, first will be for Chat (were user can type anything to get appropriate results) second will be translation section.
Add the following code to App.tsx
import React, {useState} from 'react';
import {View, Text, StyleSheet, Image, Pressable, TextInput} from 'react-native';
import {Conversation as ConversationIcon, Translate} from './assets';
import { Conversation, Translation } from './src/components';

interface ContentProps {
  selectedIndex: number;
}

const Content: React.FC<ContentProps> = ({ selectedIndex }) => {
  switch (selectedIndex) {
    case 0:
      return <Conversation />
    case 1:
      return <Translation />
    default: return <></>;
  }
}

const App: React.FC = () => {
  const [selectedIndex, setSelectedIndex] = useState<number>(0);
  const changeSelection = (selection: number) => () => setSelectedIndex(selection);
  return (
    <View style={styles.container}>
      <Content {...{selectedIndex}} />
      <View style={styles.tabBar}>
        <Pressable onPress={changeSelection(0)}>
          <Image style={styles.tabIcon} source={ConversationIcon} />
        </Pressable>
        <Pressable onPress={changeSelection(1)}>
          <Image style={styles.tabIcon} source={Translate} />
        </Pressable>
      </View>
    </View>
  );
};

const styles = StyleSheet.create({
  container: {
    flex: 1,
    justifyContent: 'flex-end',
    alignItems: 'center',
  },
  tabBar: {
    flexDirection: 'row',
    justifyContent: 'space-around',
    alignItems: 'center',
    paddingBottom: 30,
    paddingTop: 20,
    backgroundColor: '#82AAE3',
    width: '100%',
    shadowColor: "#000",
    shadowOffset: {
      height: -6,
      width: 0
    },
    shadowOpacity: 0.2,
    shadowRadius: 10,
  },
  tabIcon: {
    width: 24,
    height: 24,
  },
});

export default App;
As you would have noticed we have not yet created Conversation and Translation components. Let’s go ahead and create these, starting with the Conversation component.
Create a new folder at the root of project named src and another folder named components inside it.
mkdir src && cd src && mkdir components && cd components && touch index.ts
mkdir Conversation && cd Conversation && touch index.tsx && touch styles.ts
Now paste the following code inside index.tsx file of Conversation folder.
import React, {useCallback, useRef, useState} from 'react';
import {
  Image,
  KeyboardAvoidingView,
  Platform,
  ScrollView,
  Text,
  TextInput,
  View,
} from 'react-native';
import {Typing} from '../../../assets';
import {getAnswer} from '../../services/api';
import styles from './styles';

export const Conversation: React.FC = () => {
  const [text, setText] = useState<string>('');
  const [loading, setLoading] = useState<boolean>(false);
  const [conversation, setConversation] = useState<Record<string, string>>({});
  const scrollRef = useRef<ScrollView>(null);

  const handleSubmit = useCallback(async () => {
    setTimeout(() => scrollRef?.current?.scrollToEnd({animated: true}), 200);
    setConversation(prev => ({
      ...prev,
      ...{[`sent${Object.keys(prev)?.length}`]: text},
    }));
    setText('');
    setLoading(true);
    const answer = await getAnswer(text);
    setLoading(false);
    setConversation(prev => ({
      ...prev,
      ...{[`received${Object.keys(prev)?.length}`]: answer},
    }));
    setTimeout(() => scrollRef?.current?.scrollToEnd({animated: true}), 200);
  }, [text]);

  return (
    <>
      <ScrollView
        ref={scrollRef}
        keyboardDismissMode="interactive"
        showsVerticalScrollIndicator={false}
        keyboardShouldPersistTaps={'always'}
        contentContainerStyle={styles.scrollView}>
        {Object?.keys(conversation)?.map(keyName => {
          if (keyName?.includes('sent')) {
            return (
              <View
                key={`sent${keyName}`}
                style={[styles.sent, styles.chatBubble]}>
                <Text
                  selectable
                  selectionColor={'purple'}
                  style={styles.msgText}>
                  {conversation?.[keyName]}
                </Text>
              </View>
            );
          }
          return (
            <View key={keyName} style={[styles.received, styles.chatBubble]}>
              <Text selectable selectionColor={'yellow'} style={styles.msgText}>
                {conversation?.[keyName]?.replace('\n', '')?.replace('\n', '')}
              </Text>
            </View>
          );
        })}
        {loading && (
          <View
            key={'typingLoader'}
            style={[styles.received, styles.chatBubble]}>
            <Image
              resizeMode="contain"
              source={Typing}
              style={styles.typingLoader}
            />
          </View>
        )}
      </ScrollView>
      <KeyboardAvoidingView
        style={styles.container}
        behavior={Platform.OS === 'ios' ? 'padding' : 'height'}>
        <TextInput
          blurOnSubmit
          autoCapitalize="none"
          autoComplete="off"
          autoCorrect={false}
          keyboardAppearance={'dark'}
          keyboardType={'web-search'}
          style={styles.input}
          placeholder="Ask me anything...."
          value={text}
          onChangeText={setText}
          onSubmitEditing={handleSubmit}
          placeholderTextColor={'#1116'}
        />
      </KeyboardAvoidingView>
    </>
  );
};
Before we get into the above code, paste the below code in styles.ts file in same folder.
import {Dimensions, StyleSheet} from 'react-native';

export const WIDTH = Dimensions.get('window').width;

export default StyleSheet.create({
  container: {
    flex: 1,
    justifyContent: 'flex-end',
    alignItems: 'center',
  },
  input: {
    borderWidth: 2,
    borderColor: '#91D8E4',
    width: WIDTH - 40,
    height: 60,
    borderRadius: 12,
    backgroundColor: '#EAFDFC',
    paddingHorizontal: 14,
    fontWeight: '700',
    color: '#000',
    marginBottom: 20,
    shadowColor: '#82AAE3',
    shadowOffset: {
      height: 0,
      width: 0,
    },
    shadowOpacity: 0.4,
    shadowRadius: 4,
  },
  loader: {
    position: 'absolute',
    width: '100%',
    height: '100%',
    zIndex: 999,
    backgroundColor: '#fffc',
    justifyContent: 'center',
    alignItems: 'center',
  },
  scrollView: {
    paddingHorizontal: 20,
    paddingTop: 60,
    paddingBottom: 140,
    width: WIDTH,
  },
  sent: {
    backgroundColor: '#04DE71',
    alignSelf: 'flex-end',
  },
  received: {
    backgroundColor: '#2094FA',
    alignSelf: 'flex-start',
  },
  chatBubble: {
    borderRadius: 20,
    paddingVertical: 12,
    marginBottom: 8,
    maxWidth: WIDTH / 2 + 80,
    paddingHorizontal: 16,
  },
  msgText: {
    fontWeight: '500',
    color: '#FFF',
    letterSpacing: 0.2,
  },
  typingLoader: {
    width: 80,
    height: 20
  }
});
Now let’s discuss what does the code in Conversation component do.
We have done the following in code:
- We have created three state variable for storing and updating the
text,loadingstate, andconversation. We also created a ref object namedscrollRefwhich we will use to scroll to the bottom of our chat scrollview. - Then we have declared a
handleSubmitmethod, this method is responsible for setting the user end of text intoconversationand then calling thegetAnswermethod which calls our backend API and returns the answer from API (We will create this method in next step). Then we are appending the answer we get from API into ourconversationstate var. Scrollviewis used to render all the data inconverationvariable. We are mapping over it to render all the texts we sent and got from the api.- Lastly we have our
TextInputwrapped in aKeyBoardAvoidingViewso that it doesn’t hide behind device keyboard. ThisTextInputis responsible for getting input from the user and calling thehandleSubmitmethod when user submits into theTextInput.
This will not work yet as we have not create the getAnswer method yet.
To do so, create a new folder name services in src and inside the folder create another folder named api , then a file name index.ts .
cd src && mkdir services && cd services
mkdir api && cd api
touch index.ts
For calling API’s in our application we will use axios , so lets install it.
yarn add axios
   OR
npm i axios
After the dependency is installed, paste the below code inside index.ts file.
import axios from 'axios';
const BASE_URL = 'http://nextjs-chatgpt-be.vercel.app/api/';

export const getAnswer = async (question: string) => {
  try {
    const res = await axios.post(
      `${BASE_URL}ask-a-question`,
      {question},
    );
    return res?.data?.result;
  } catch (e) {
    console.error(e);
    return 'Something went wrong!! ☹️';
  }
};

export const getTranslatedText = async (query: string, language: string) => {
  try {
    const res = await axios.post(`${BASE_URL}translate`, {query, language});
    return res?.data?.result;
  } catch (e) {
    console.error(e);
    return 'Something went wrong!! ☹️';
  }
};
In the above code we have declared two methods:
getAnswerfor calling theask-a-questionendpointgetTranslatedTextfor calling thetranslateendpoint (We will use this method in later steps).
After writing all this code our app will look like this:
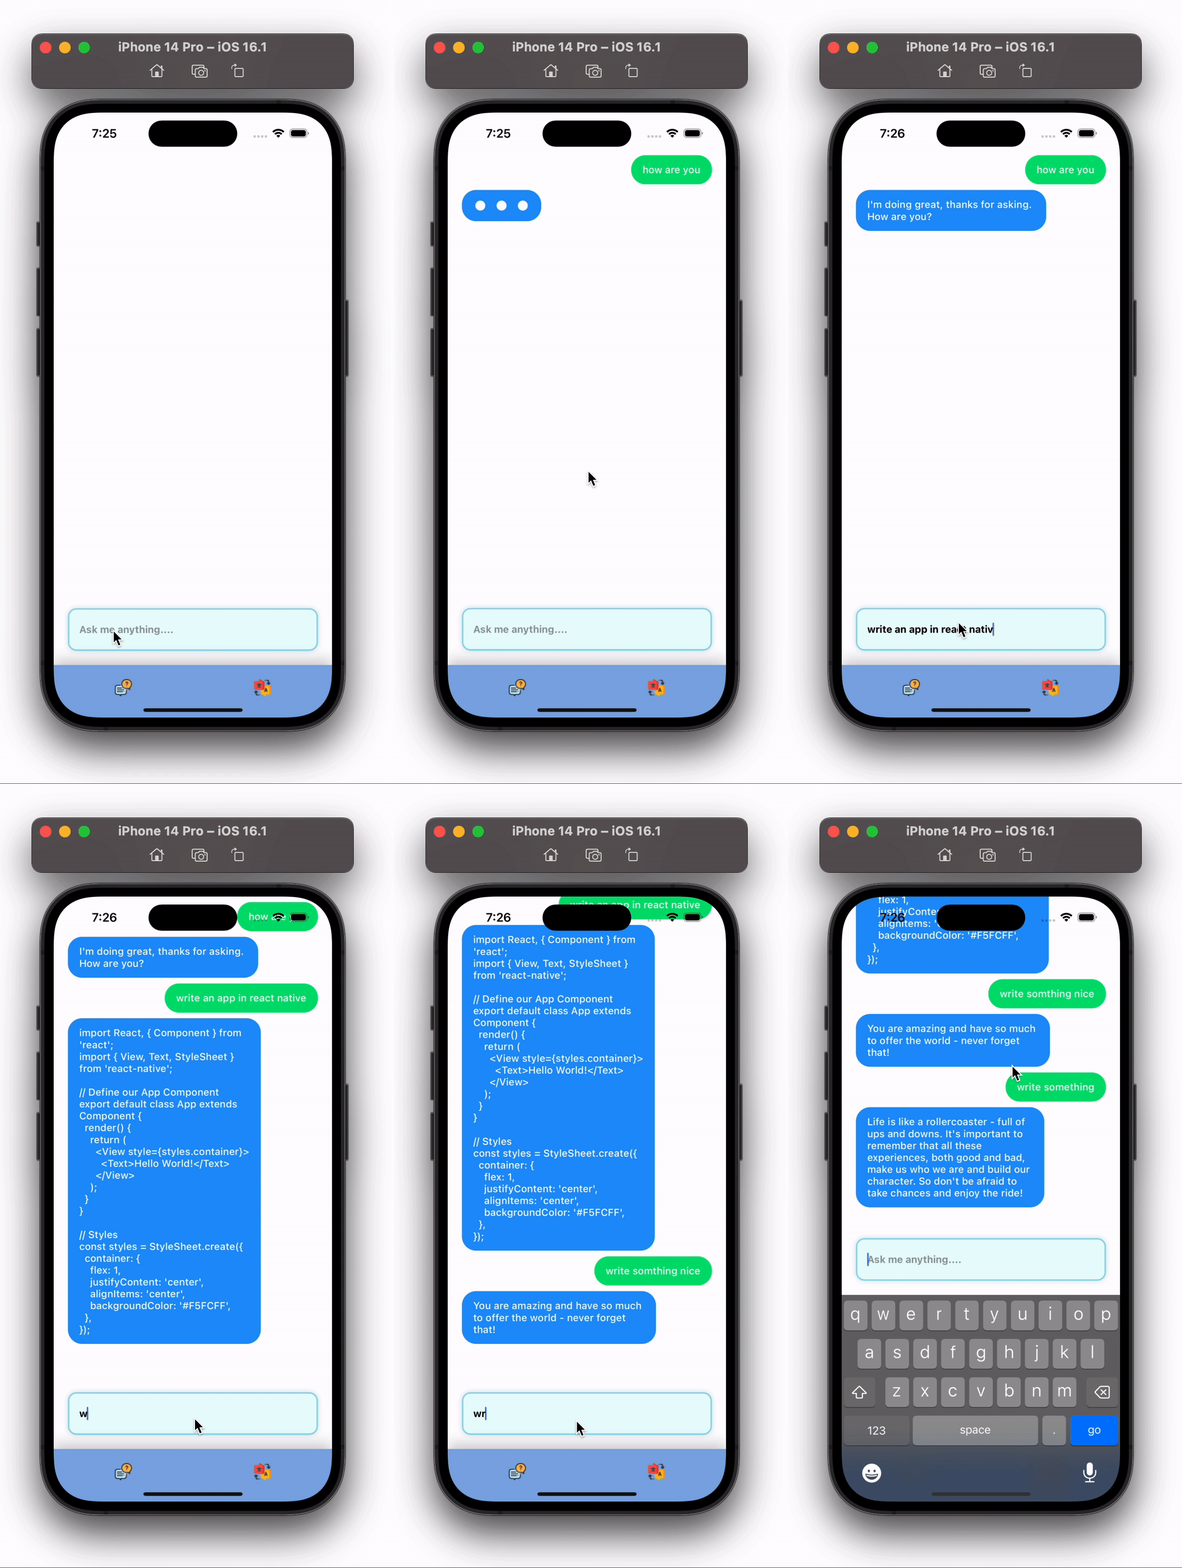
Isn’t this cool 😎 , we just created a full chatbot in React Native using minimal code.
Let’s move onto the final part, creating the text translation app.
Create a folder named Translation in components folder.
cd components && mkdir Translation && cd Translation
touch index.tsx && touch styles.ts
Add the below code in styles.ts
import {StyleSheet} from 'react-native';
import {WIDTH} from '../Conversation/styles';

export default StyleSheet.create({
  container: {
    flex: 1,
    justifyContent: 'flex-start',
    alignItems: 'center',
    paddingTop: 80,
  },
  input: {
    borderWidth: 2,
    borderColor: '#91D8E4',
    width: WIDTH - 40,
    height: 60,
    borderRadius: 12,
    backgroundColor: '#EAFDFC',
    paddingHorizontal: 14,
    fontWeight: '700',
    color: '#000',
    marginBottom: 20,
    shadowColor: '#82AAE3',
    shadowOffset: {
      height: 0,
      width: 0,
    },
    shadowOpacity: 0.4,
    shadowRadius: 4,
  },
  translatedText: {
    fontWeight: '700',
    fontSize: 24,
    color: '#000',
    textAlign: 'left',
    alignSelf: 'flex-start',
    letterSpacing: 0.4,
  }
});
Add the following code in index.tsx
import {View, Text, TextInput, Button, ActivityIndicator} from 'react-native';
import React, {useCallback, useState} from 'react';
import styles from './styles';
import {getTranslatedText} from '../../services/api';

export const Translation: React.FC = () => {
  const [text, setText] = useState<string>('');
  const [language, setLanguage] = useState<string>('English');
  const [translatedText, setTranslatedText] = useState<string>('');
  const [loading, setLoading] = useState<boolean>(false);
  const translateText = useCallback(async () => {
    setLoading(true);
    const result = await getTranslatedText(text, language);
    setTranslatedText(result);
    setLoading(false);
  }, [text, language]);
  return (
    <View style={styles.container}>
      <TextInput
        placeholder="Enter text to translate"
        style={styles.input}
        value={text}
        onChangeText={setText}
        placeholderTextColor={'#1116'}
      />
      <TextInput
        placeholder="Enter Language to translate in"
        style={styles.input}
        value={language}
        onChangeText={setLanguage}
        placeholderTextColor={'#1116'}
      />
      {loading ? (
        <ActivityIndicator size={'large'} color={'#2094FA'} />
      ) : (
        <Button title={`Translate to ${language}`} onPress={translateText} />
      )}
      <Text style={styles.translatedText}>{translatedText}</Text>
    </View>
  );
};
This is a very simple component which has two TextInputs to handle two state variables text and language . text is the actual string which user wants to translate and language is the desired language which user wants to translate into.
Then we have a Button which when pressed calls the translateText method. This method calls the getTranslatedText method which fetches the translated text from our API.
Output of above code will similar to below:
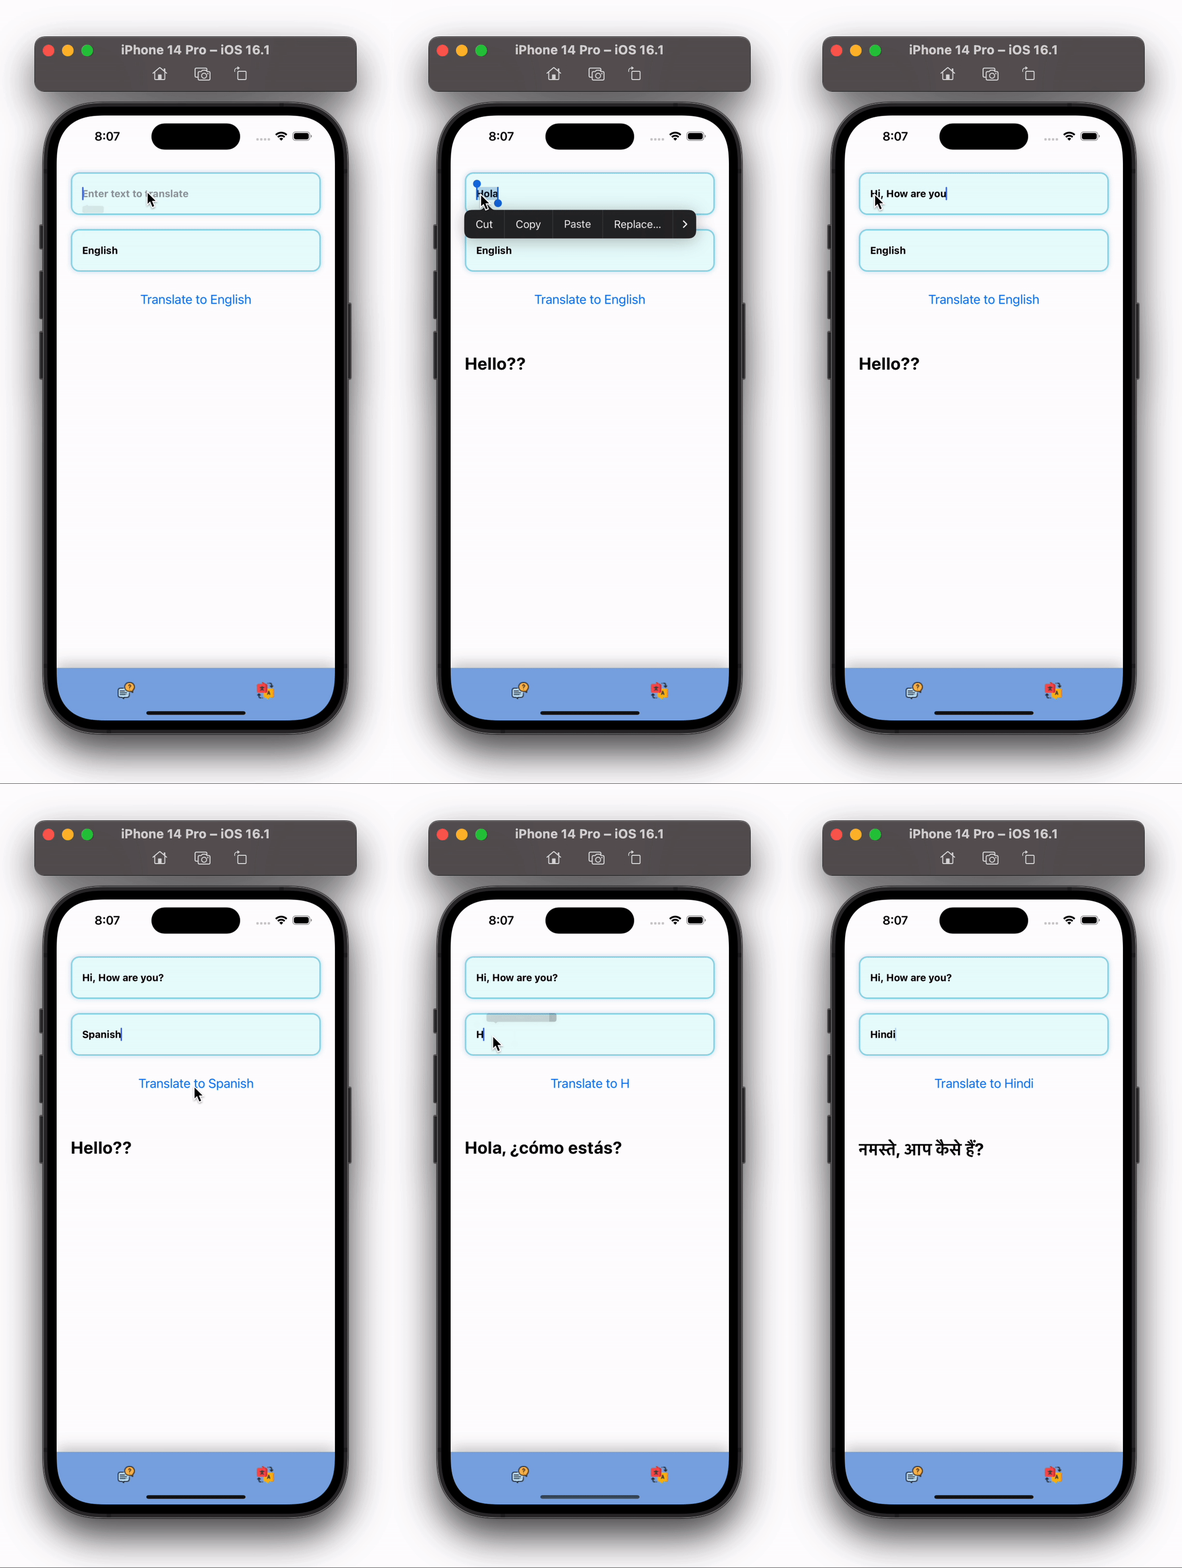
Congratulations , you just made a ChatBot and Transaltion App using React Native and Nextjs.
Conclusion
As i was getting lazy i used ChatGPT to write the conclusion for this article. 😆
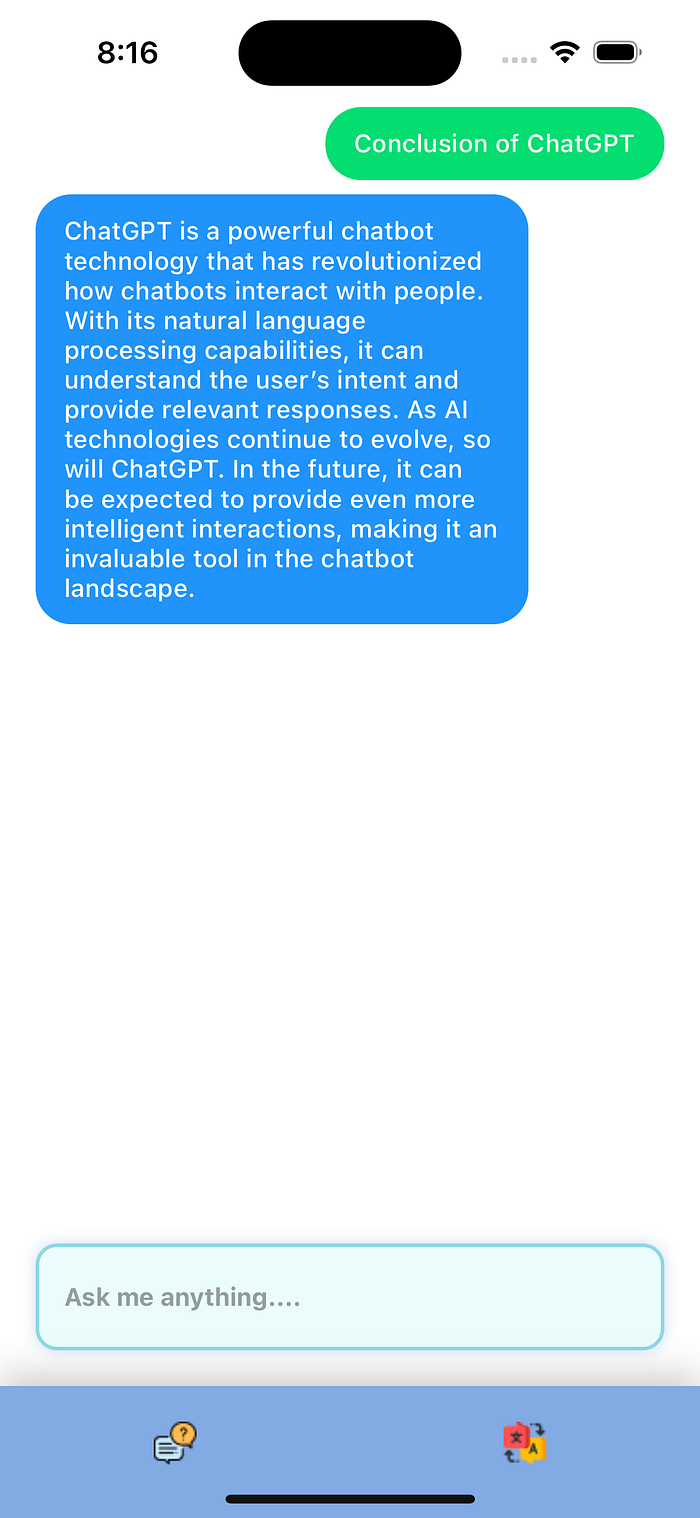
ChatGPT is a powerful chatbot technology that has revolutionized how chatbots interact with people. With its natural language processing capabilities, it can understand the user’s intent and provide relevant responses. As AI technologies continue to evolve, so will ChatGPT. In the future, it can be expected to provide even more intelligent interactions, making it an invaluable tool in the chatbot landscape. — From ChatGPT
Thank you.
Comments
Post a Comment
Thank You.