Let's explore some of GitHub's GraphQL API features and some code examples how to use this API
If you're a developer who loves to explore new tools and technologies, then you're probably already familiar with GitHub and its powerful API. But have you heard of GitHub's GraphQL API?
It's a relatively new addition to the GitHub API family, and it's quickly gaining popularity among developers for its flexibility and efficiency. In this article, let's learn how we can use GitHub's GraphQL API and make the most out of it.
A series that aims to introduce the basic concepts of GraphQL and provide step-by-step examples of integrating GraphQL APIs into any app.
Why GitHub's GraphQL API?
The GitHub GraphQL API is a powerful tool for developers to interact with GitHub's platform and data. Here are some use cases for the GitHub GraphQL API:
Customizing your GitHub workflow
Building GitHub integrations
Analyzing GitHub data
Creating GitHub bots
Developing GitHub apps
Step 1: Authenticate
To use GitHub GraphQL API, we first have to authenticate ourselves. There are 3 ways you can do so:
Using Personal Access Token
Using GitHub App
Using OAuth
For the sake of simplicity, let's use the personal access token way in this tutorial.
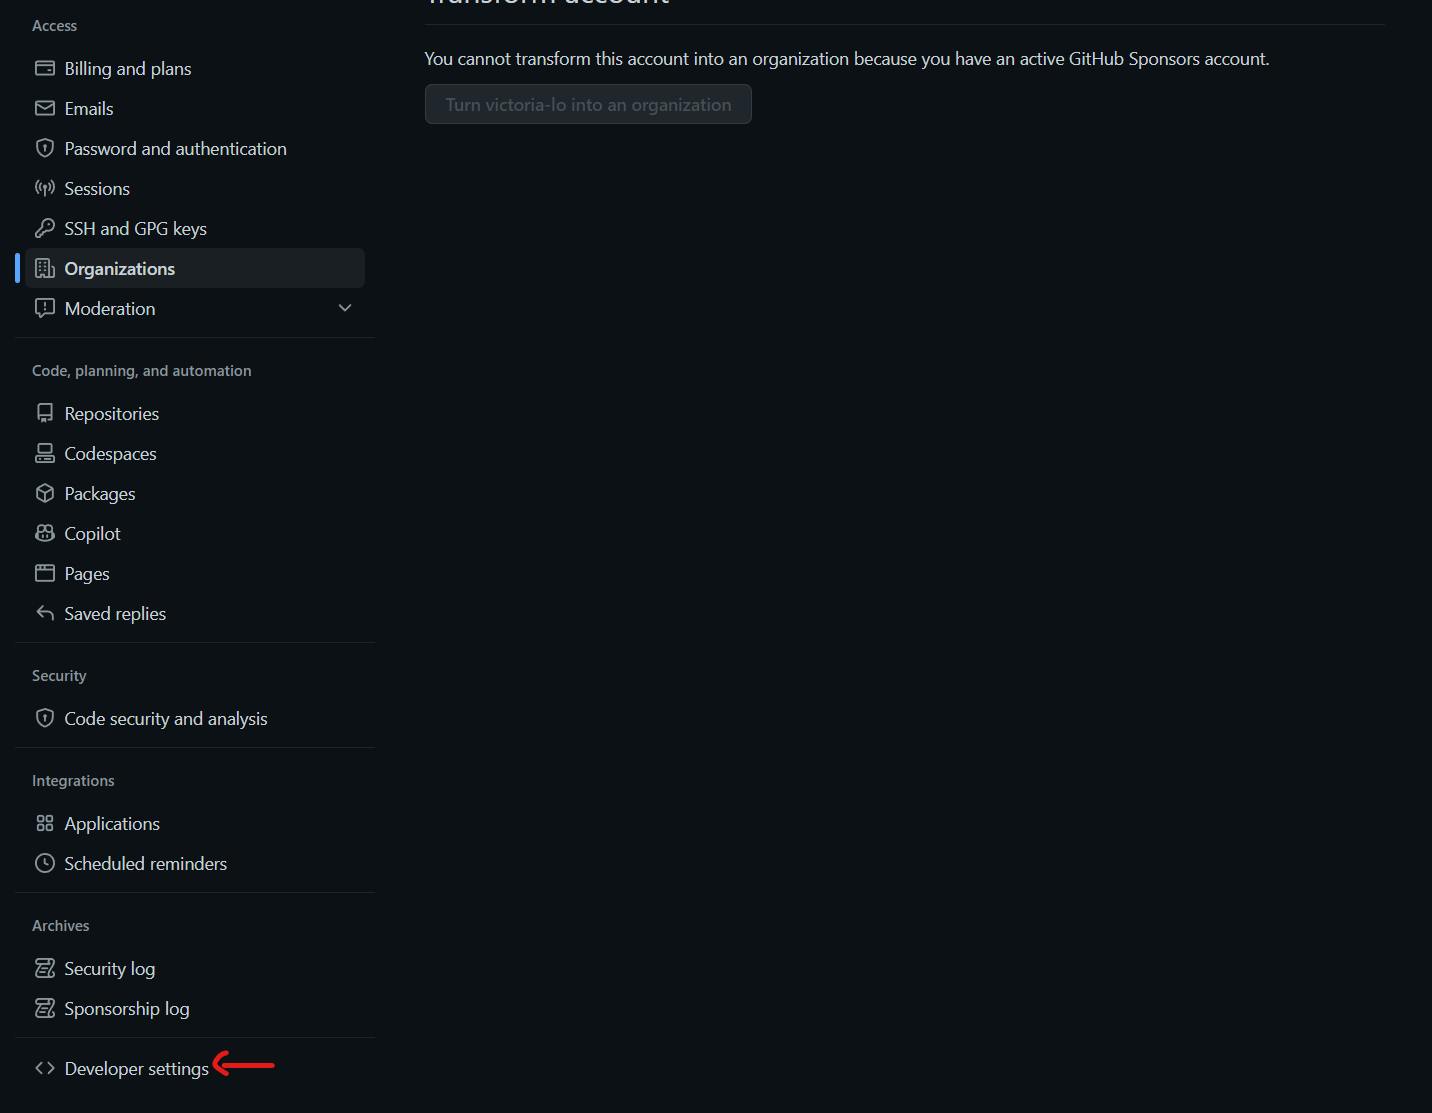
First, go to your GitHub account settings at https://github.com/settings/profile. Then, scroll down to Developer Settings, as shown in the screenshot below.
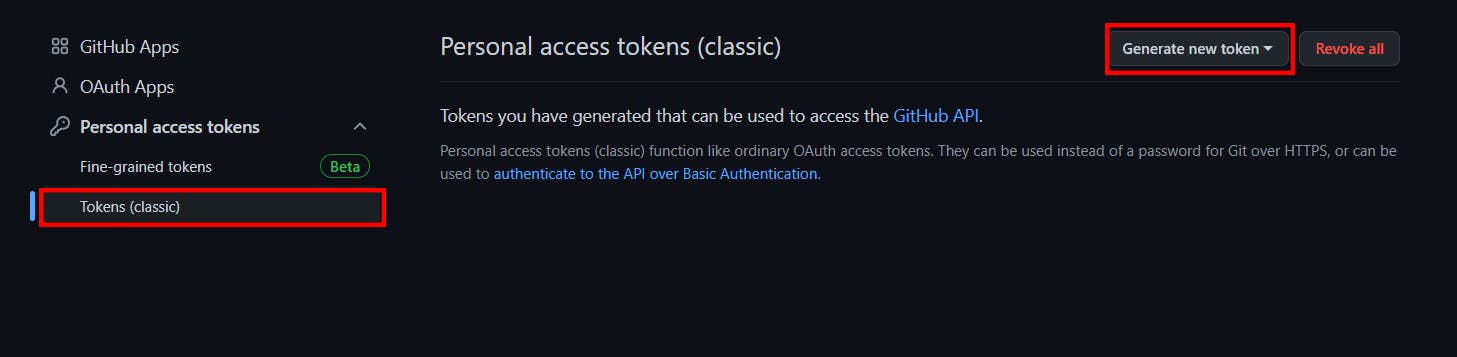
Navigate to Personal access tokens > Tokens (classic). Then click Generate new token. Select the scopes you need to request data from the GraphQL API. Store this token somewhere safe.
Step 2: Sample Query
You can easily find the available mutations and queries from the GitHub GraphQL Explorer.
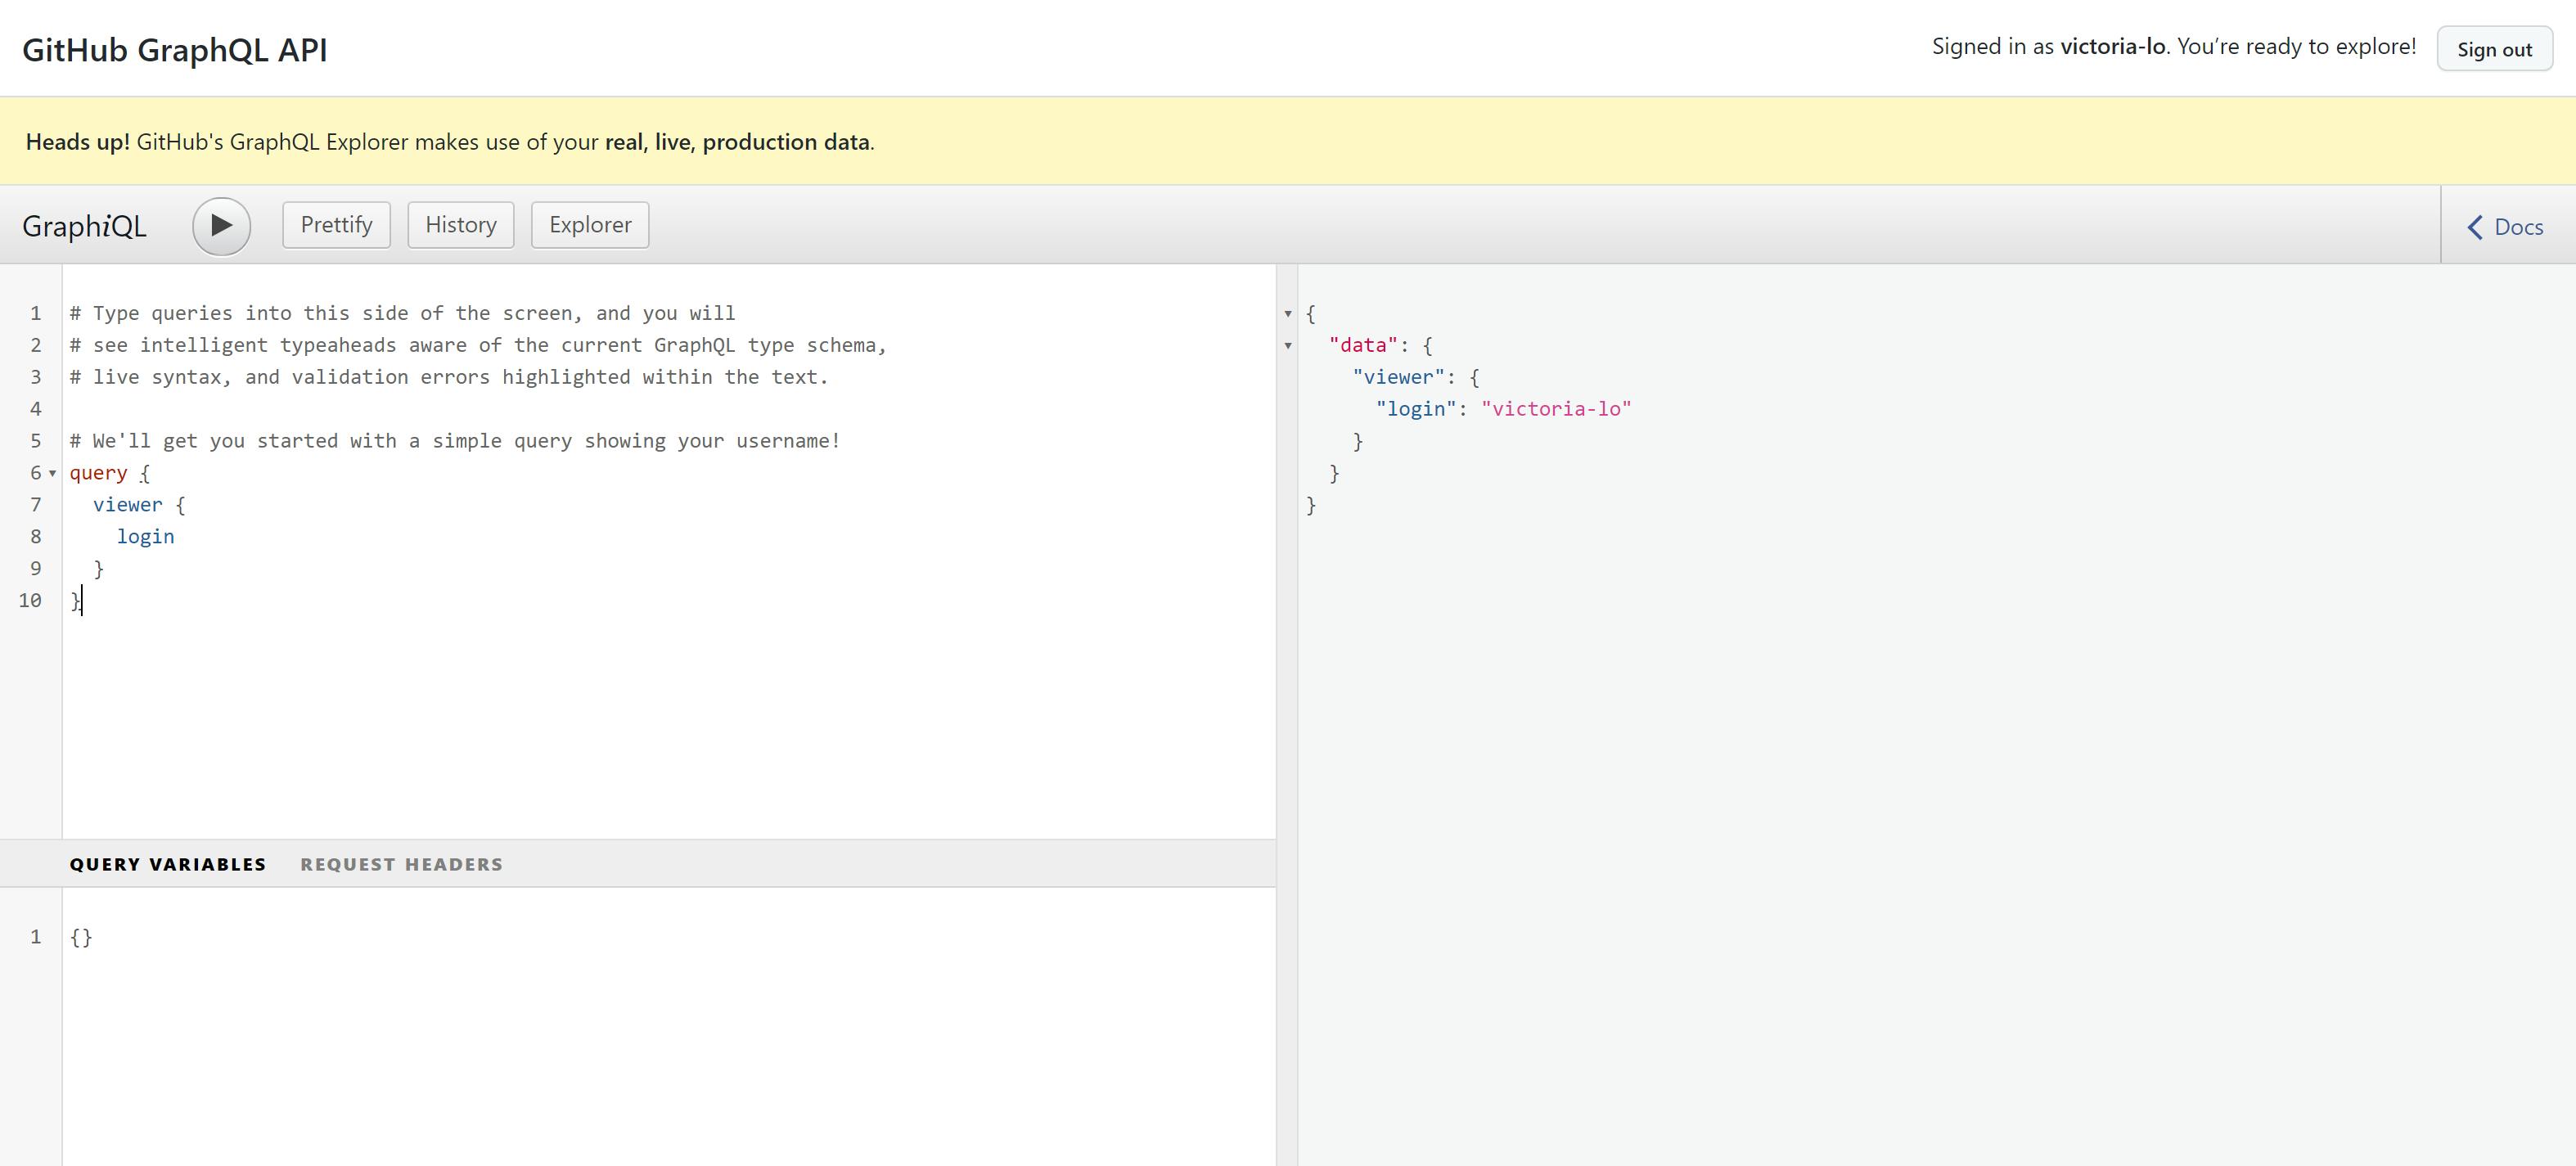
Now let's try out a sample query:
query {
  repository(owner:"octocat", name:"hello-world") {
    name
    description
    primaryLanguage {
      name
    }
  }
}
In this query, we're specifying the repository field, which takes two arguments: owner and name. These arguments specify the repository we want to retrieve information for.
To run this query using the GitHub GraphQL API, we could use a tool like curl to make a POST request to the API endpoint: https://api.github.com/graphql
Here's our sample query:
curl -X POST -H "Authorization: bearer <TOKEN>" -H "Content-Type: application/json" -d '{"query": "query { repository(owner:\"octocat\", name:\"hello-world\") { name description primaryLanguage { name } } }"}' https://api.github.com/graphql
Note that you'll need to replace <TOKEN> with your own personal access token retrieved from step 1.
Step 3: Automate Workflow example
Let's say we want to automatically label any new issues that are opened in our repository based on their content. We can use the GitHub GraphQL API to create a new issue label and add it to an issue.
To do this, we'll need a GraphQL mutation to create the new label and add it to an issue. Here's an example mutation:
mutation {
  createLabel(input: {repositoryId: "<REPOSITORY_ID>", name: "bug", color: "d73a4a"}) {
    label {
      id
      name
    }
  }
  addLabelsToLabelable(input: {labelableId: "<ISSUE_ID>", labelIds: ["<LABEL_ID>"]}) {
    clientMutationId
  }
}
In this example, we're using running 2 mutations together:
createLabel: creates a new label with the name "bug" and the color "#d73a4a"addLabelsToLabelable: adds the new label to an issue with the ID<ISSUE_ID>
Let's run the mutations in curl:
curl -X POST -H "Authorization: bearer <TOKEN>" -H "Content-Type: application/json" -d '{"query": "mutation { createLabel(input: {repositoryId: \"<REPOSITORY_ID>\", name: \"bug\", color: \"d73a4a\"}) { label { id name } } addLabelsToLabelable(input: {labelableId: \"<ISSUE_ID>\", labelIds: [\"<LABEL_ID>\"]}) { clientMutationId } }"}' https://api.github.com/graphql
<REPOSITORY_ID> will be the ID of the repository you want to create the label in.<ISSUE_ID> is the ID of the issue you want to add the label to, and <LABEL_ID> is ID of the label that was created in the previous mutation.
You can use a listener, such as GitHub's Webhooks or an external service like Zapier, to trigger GraphQL API calls and automate actions in your repositories.
Conclusion
Working with GitHub's GraphQL API may seem intimidating, but once you get the hang of it, it can be a powerful tool for building efficient and dynamic applications. There are infinite possibilities you can use with this API to create the optimal developer workflow and environment for yourself.
Thanks for reading! I hope this can help get you started in exploring this API! Feel free to like and share this article if it is helpful! Cheers!
This article was written with AI assistance :)
Comments
Post a Comment
Thank You.