APNS Certificate/ PEM file
In order to send push notifications to your app, an APNS certificate has to be created for your app and the same has to be converted to .pem format and uploaded to our dashboard. Follow the steps below to create APNS certificate for your app :
Generating the Certificate Signing Request (CSR)
Open Keychain Access on your Mac (it is in Applications/Utilities) and choose the menu option Request a Certificate from a Certificate Authority.
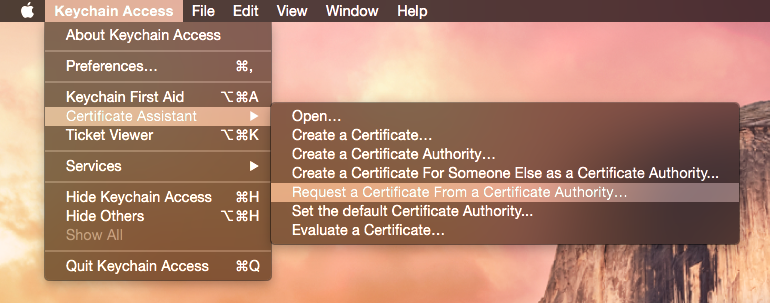
You should now see the following window:
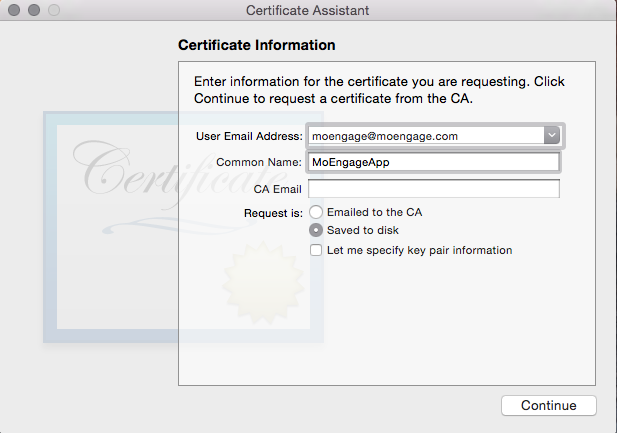
Enter your email address here. Enter your app name for Common Name. This allows us to easily find the private key later. Check Saved to disk and click Continue. Save the file as “Yourappname.certSigningRequest”.
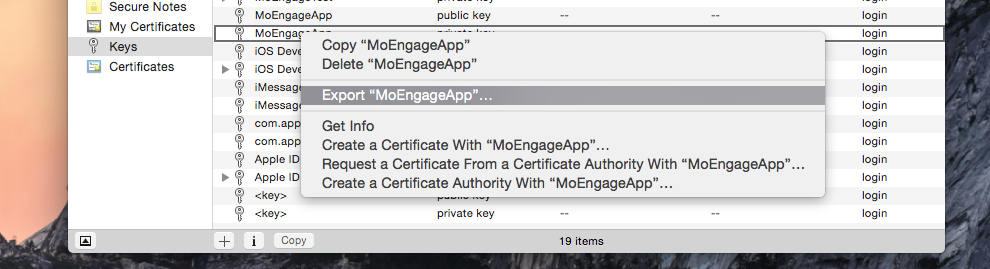
Go to the Keys section of Keychain Access, you will see that a new private key has appeared in your keychain. Right click it and choose Export. Save the private key as yourappkey.p12 and enter a passphrase.
Creating an App ID and SSL Certificate
Login to the iOS Dev Center and “Select the Certificates, Identifiers and Profiles” from the left panel. Select Certificates in the iOS Apps section. Go to App IDs in the Identifiers and click the + button.
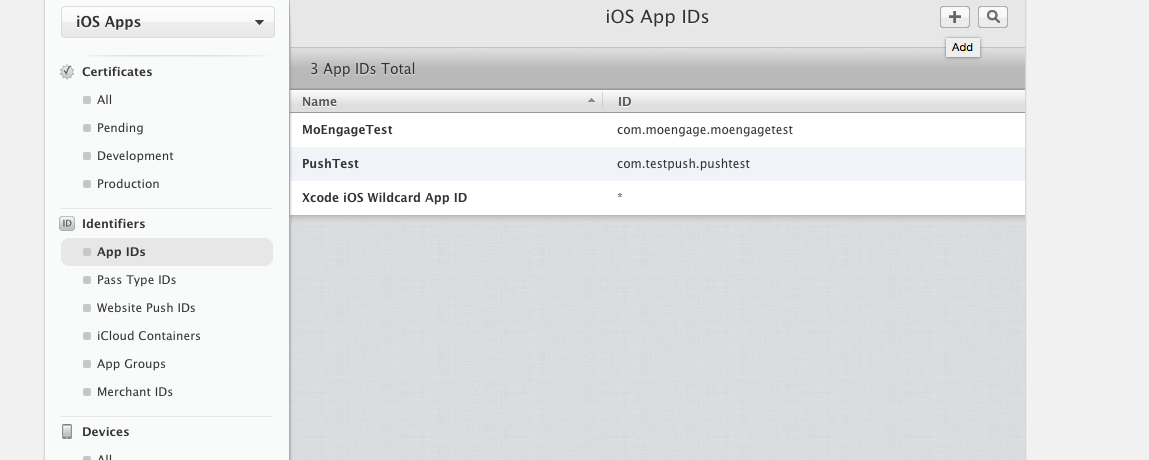
Fill the following details in the window presented: App ID. Description: yourappname In the App Services. Make sure you check the Push Notifications Checkbox. Explicit App ID: your app bundle id (in the format com.example.exampleapp).
Press the Continue button. You will be asked to verify the details of the app id, if everything seems fine, click Submit. You have successfully registered a new App ID.
After you have made the App ID, it shows up in the App IDs list. Select the yourappname app ID from the list. This will open up a window as shown below:
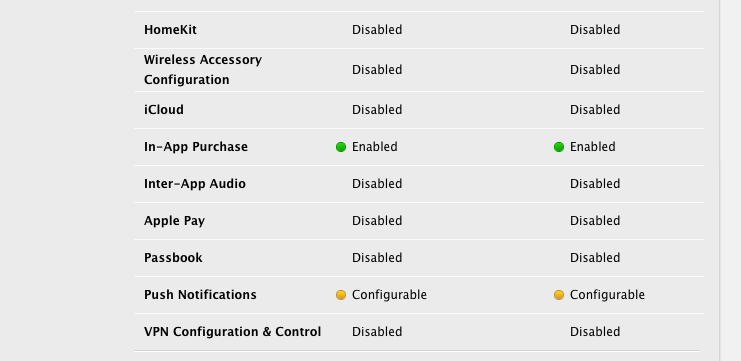
There are two orange lights that say “Configurable” in the Development and Distribution column. This means your App ID can be used with push, but you still need to set this up. Click on the Edit button to configure these settings.
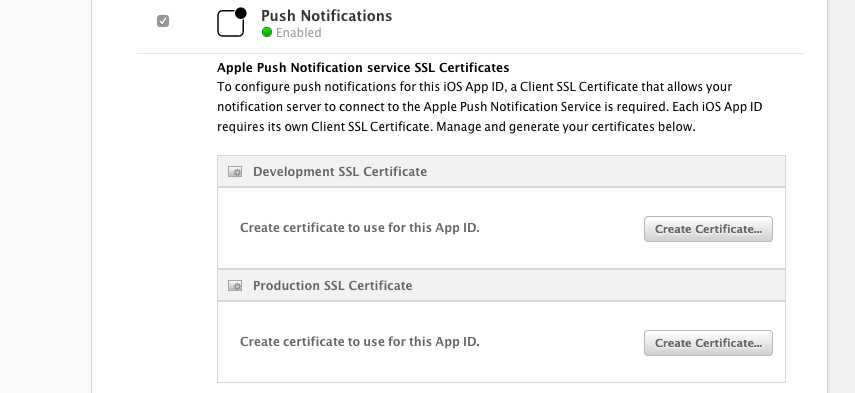
Scroll down to the Push Notifications section and select the Create Certificate button in the Production SSL Certificate section.
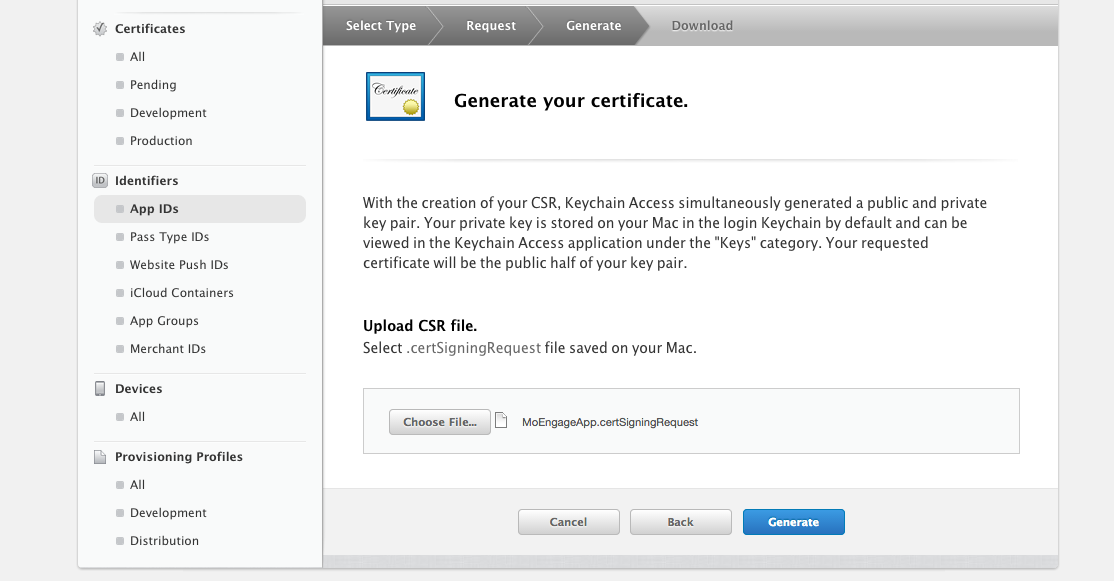
The “Add iOS Certificate” wizard comes up, The first thing it asks you is to generate a Certificate Signing Request. You already did that, so click Continue. In the next step you upload the CSR. Choose the CSR file that you generated earlier and click Generate.
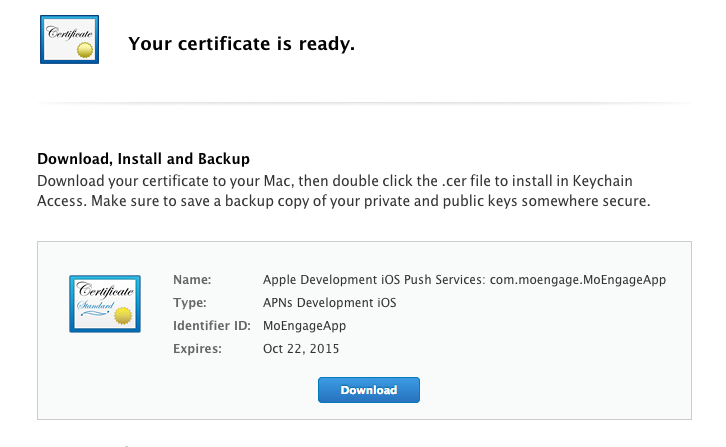
In the Your certificate is ready window, Download the certificate, it is named “aps_prod.cer”.
Creating a PEM file
So now you have 2 files: The private key as a p12 file - yourappkey.p12 and the SSL certificate - aps_prod.cer
Convert the .cer file into a .pem file:
Convert the private key’s .p12 file into a .pem file:
Now verify that your PEM file is correct.
Test it using the following command:
Test it using the following command:
Replace the "Certificate_name" and "Certificate_key" with your certificate name and key respectively. Remove the quotes.
Use the password which you used for converting the p12 to pem.
If you get the status CONNECTED(00000003) OR CONNECTED(00000006) , and the master key in the end, then the PEM is fine.
If you get the status CONNECTED(00000003) OR CONNECTED(00000006) , and the master key in the end, then the PEM is fine.
Else, please ensure that the two files you have are correct, or contact the iostutorialpoint team for help with the same.
Once the verification is done, combine the certificate and key into a single .pem file:
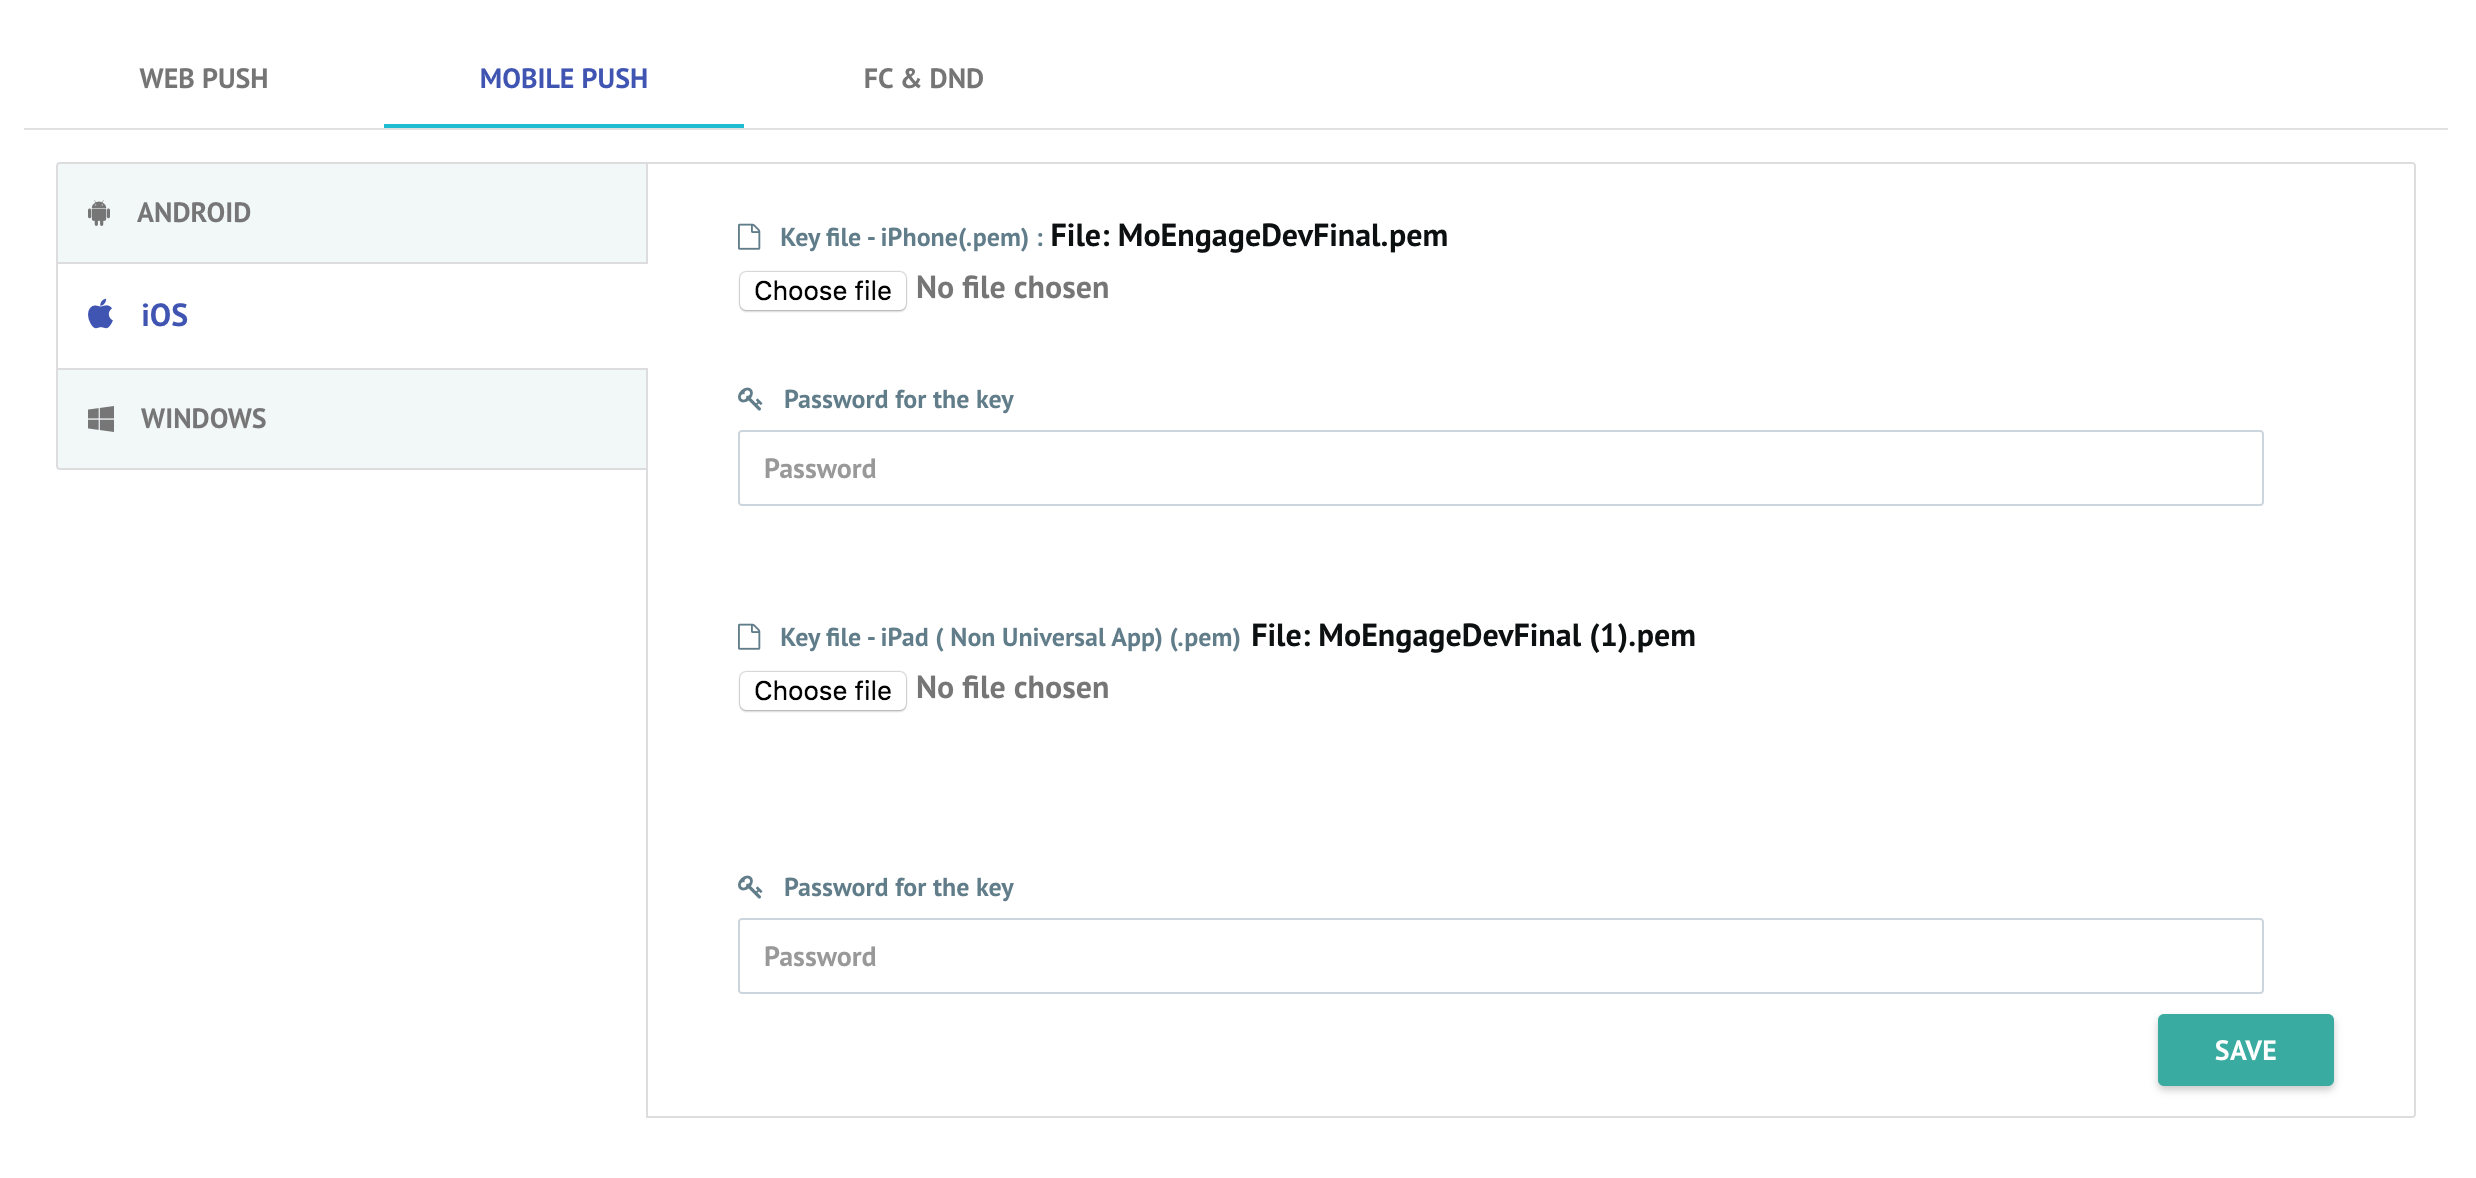
Uploading PEM file to MoEngage Dashboard
Open the settings page in the MoEngage Dashboard, go to Settings > Push > Mobile Push > iOS. Follow the steps below for uploading the .pem file:
- Upload the pem file which contains both certificate and key information.
- Enter the password for the key.
Comments
Post a Comment
Thank You.