How to integrate ChatBots and live support into your app for a better customer experience
The era of AI and human integration has begun and a major percentage of firms have started utilising this technique to increase their business. The ease of communication, in regards to any product or service, is a pro that customers look for and AI fulfils this need. The majority of websites/applications have ChatBots to serve the customer's queries and live support for efficient customer engagement. In a nutshell, AI is now a vital part of determining the success of a customer's acquisition, retention, and sales.
This article covers the topic of integration of Live Chat Support via Slack and Google DialogFlow to React Native.
This article assumes that the reader has basic working knowledge of React Native and Node JS along with basic knowledge of Socket IO, Google APIs, and Slack APIs.
Integrating Google Dialogflow
Dialogflow is a natural language understanding platform that makes it easy to design and integrate a conversational user interface into your mobile app, web application, device, bot, interactive voice response system, and so on. The following are the steps to integrate Google's Dialog Flow into our project:
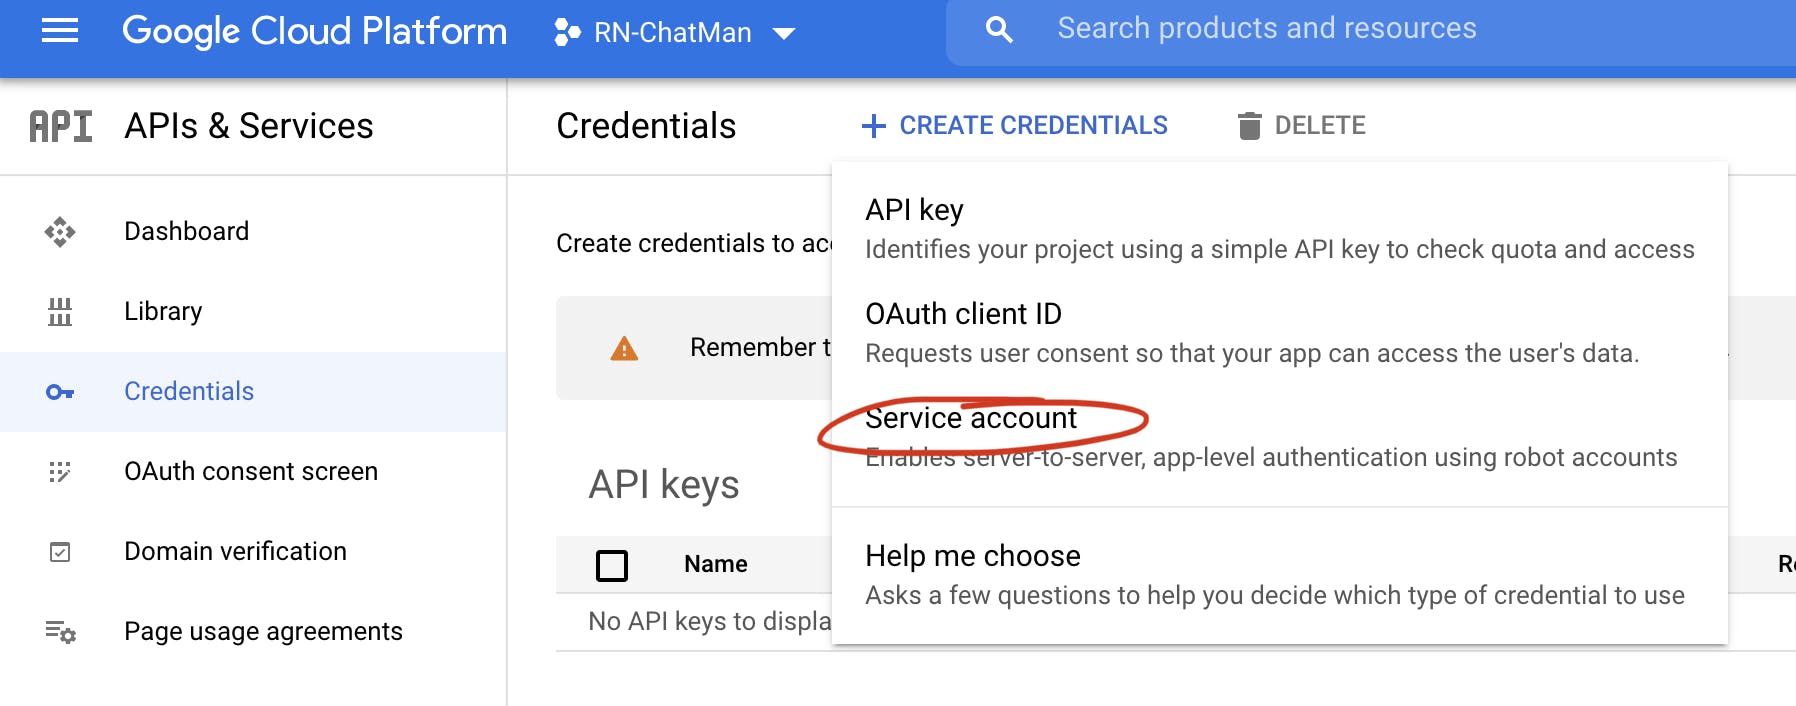
- Create a project in Google Console and enable the DialogFlow API.
- Next, generate JSON key for the DialogFlow API (Service Account).
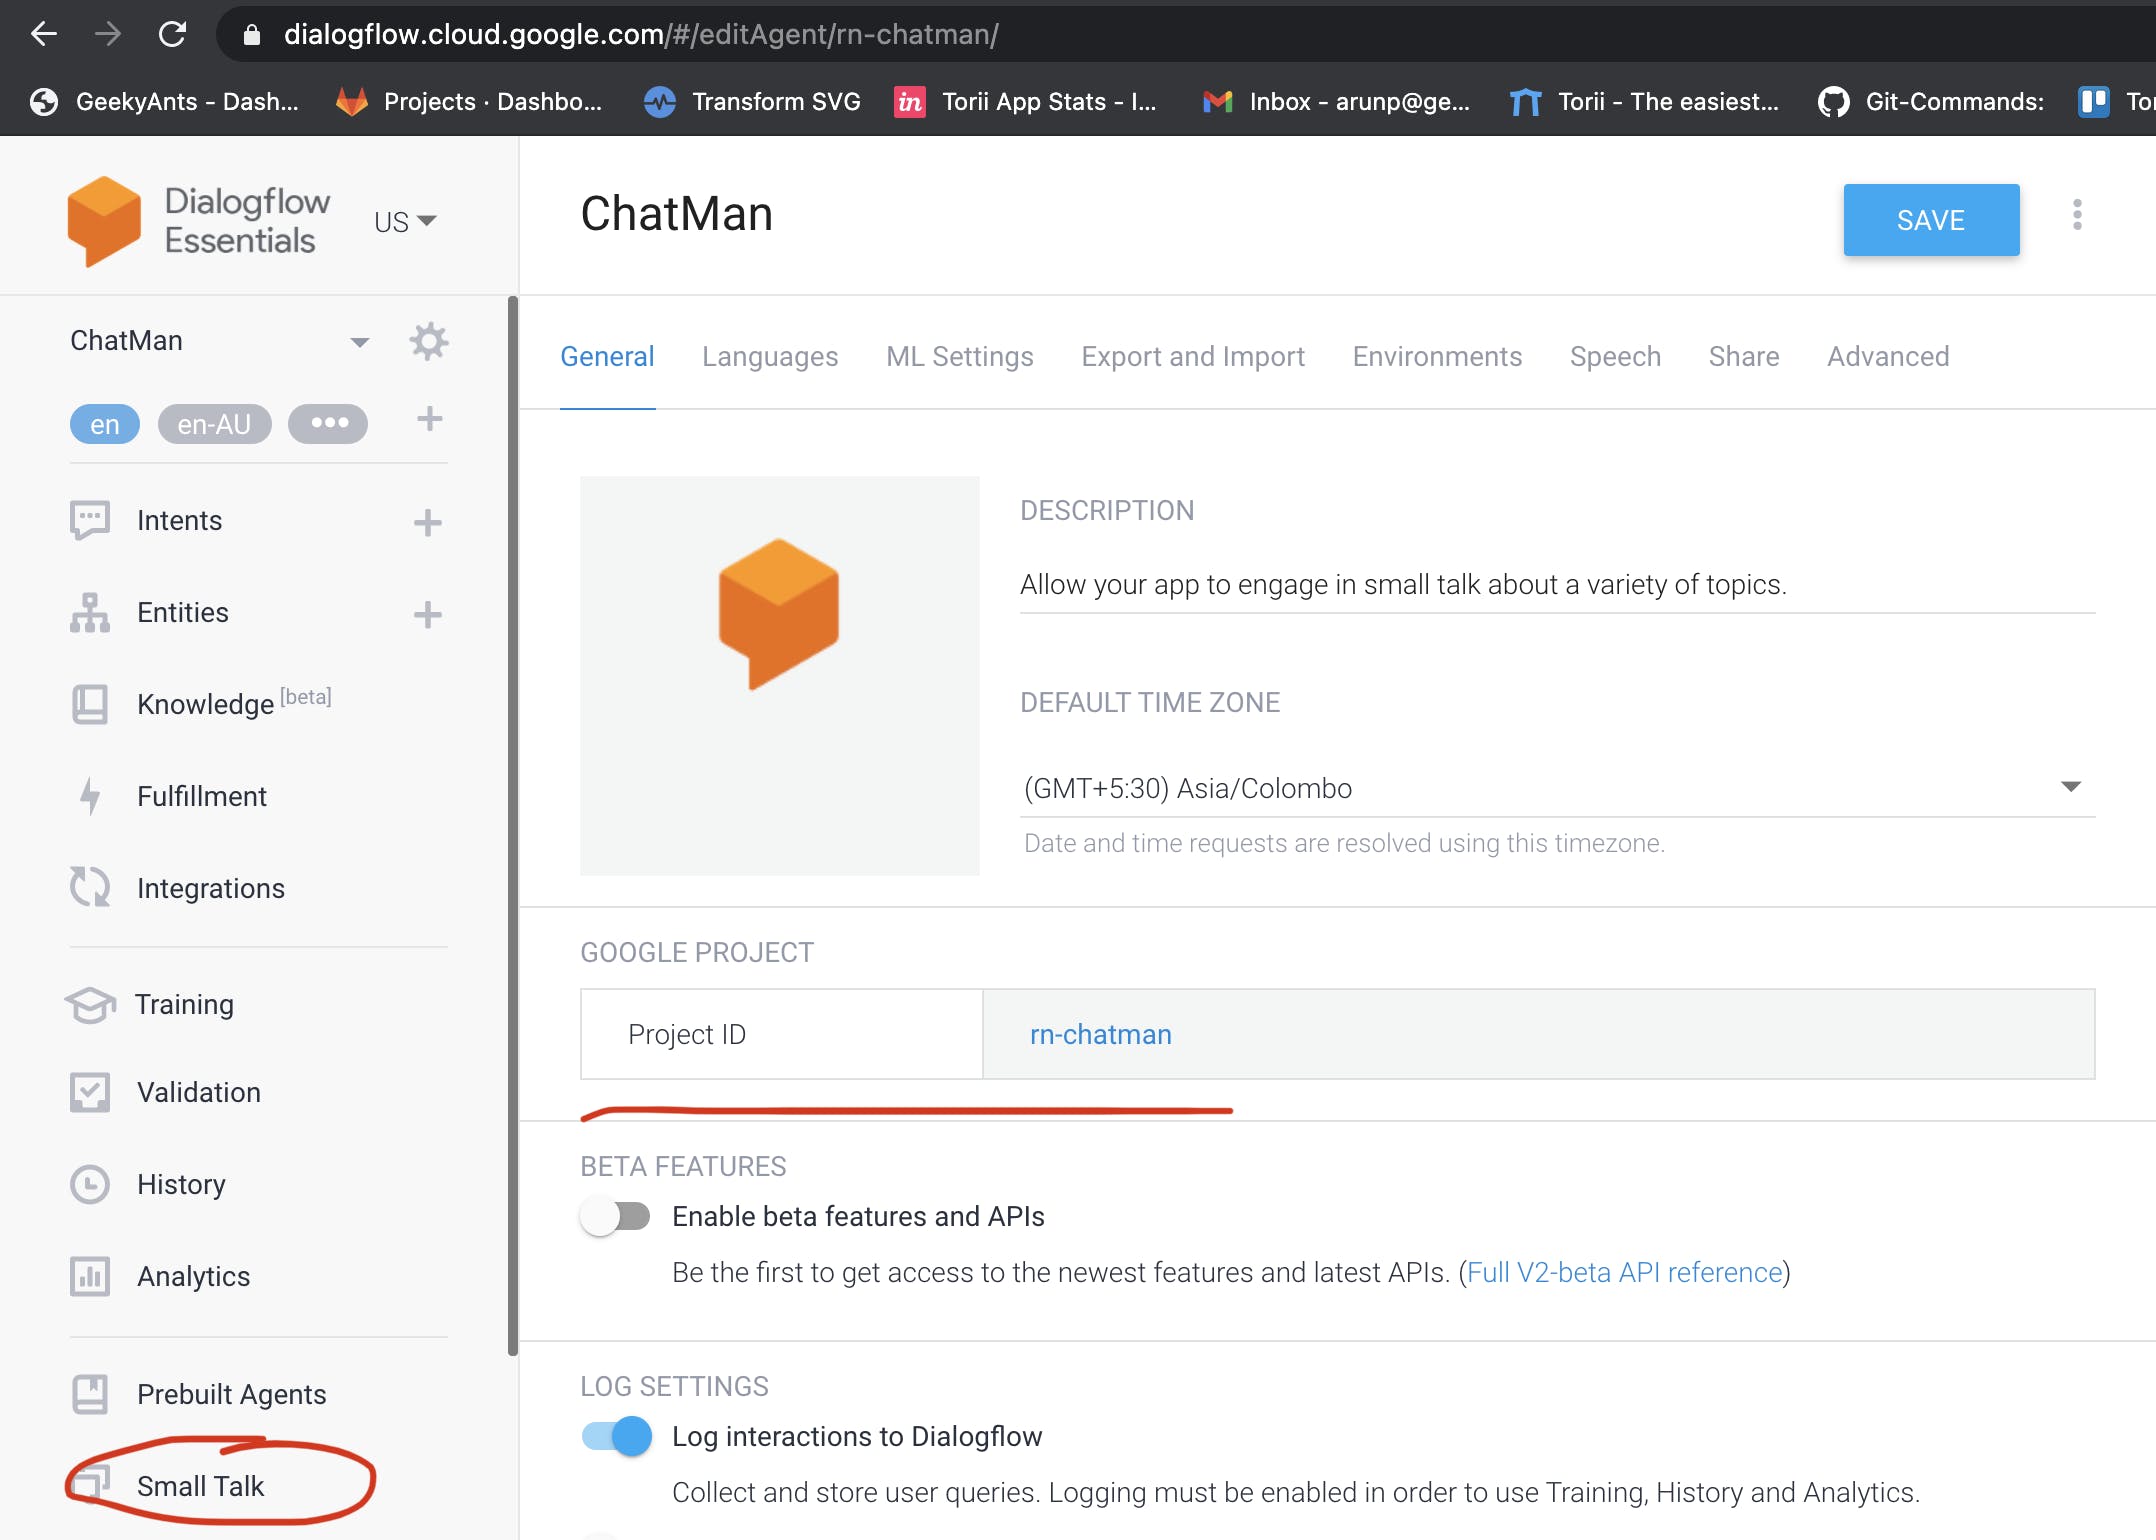
- After this, go to the DialogFlow Console and create an agent and map it to the created project.
- Next, create an intent to map the customers' queries with the responses.
For saving time, we can also enable the Small Talk feature to utilize the built-in introductory responses.
Installation of Google DialogFlow
In this article, we use Expo for RN development and a well-known package, React-Native-Gifted-Chat, for the chat component of the RN app.
- Install the dependencies while making sure the
[socket.io](http://socket.io)-clientversion andsocket.ioin API are compatible. As of Socket.IO 3.1.0, the v3 server can now communicate with v2 clients. The result, at this point, should look like:
"dependencies": {
    "@types/socket.io-client": "^1.4.33",
  "expo": "^40.0.0",
    "socket.io-client": "^2.3.0",
}
Implementation of Google DialogFlow:
Firstly, import the
JSONkey which we acquired from Google console to initialise DialogFlow like this:initializeDialogFlow = () => { this.dialogflow.setConfiguration( dialogFlowConfig.client_email, dialogFlowConfig.private_key, 'en-US', dialogFlowConfig.project_id, ); };Initializing DialogFlow would require generating
AccessTokenby making an API call to:https://accounts.google.com/o/oauth2/tokenOnce we get the
AccessTokenwe can make an API request to DialogFlow using the endpointhttps://dialogflow.googleapis.com/v2beta1/projects/like this:requestQuery = async (query: string, onResult: Function, onError: Function) => { const data = { queryInput: { text: { languageCode: this.languageTag, text: query, }, }, }; const url = `${DEFAULT_BASE_URL}${this.projectId}/agent/sessions/${this.sessionId}:detectIntent`; fetch(url, { body: JSON.stringify(data), headers: { Authorization: `Bearer ${this.accessToken}`, 'Content-Type': 'application/json; charset=utf-8', charset: 'utf-8', }, method: 'POST', }) .then((response) => { return response.json().then(onResult); }) .catch(onError); };
Next, let's get around to creating the Chat Component, as shown below:
import { Composer, GiftedChat, Send } from 'react-native-gifted-chat';
<View style={styles.basicContainer}>
    <GiftedChat
      alwaysShowSend
      bottomOffset={ANDROID ? -10 : BOTTOM_TABBAR_HEIGHT}
      isTyping={isTyping}
      messages={messages}
      onSend={(messages) => this.onSend(messages)}
      parsePatterns={this.getParsePatterns}
      renderAvatar={this._renderAvatar}
      renderUsernameOnMessage
      user={{
        _id: 1,
        avatar: USER.gravatar,
        name: USER.name,
      }}
    />
  {ANDROID && <KeyboardAvoidingView />}
</View>
Gifted-Chat provides multiple customisation options along with their components.
- When the user enters a message, it is sent to Google Dialogflow where an automated reply is created like this:
// Request to Google dialog flow
  sendToGoogle = async (message) => {
    const text = message[0].text;
    this.dialogflow.requestQuery(
      text,
      (result) => this.handleGoogleResponse(result),
      (error) => this.appendBotResponse(CONNECTION_ERROR_MESSAGE),
    );
  };
- Apart from just sending a text response, DialogFlow can also send payload objects along with the response text. This can be used for checking and other purposes.
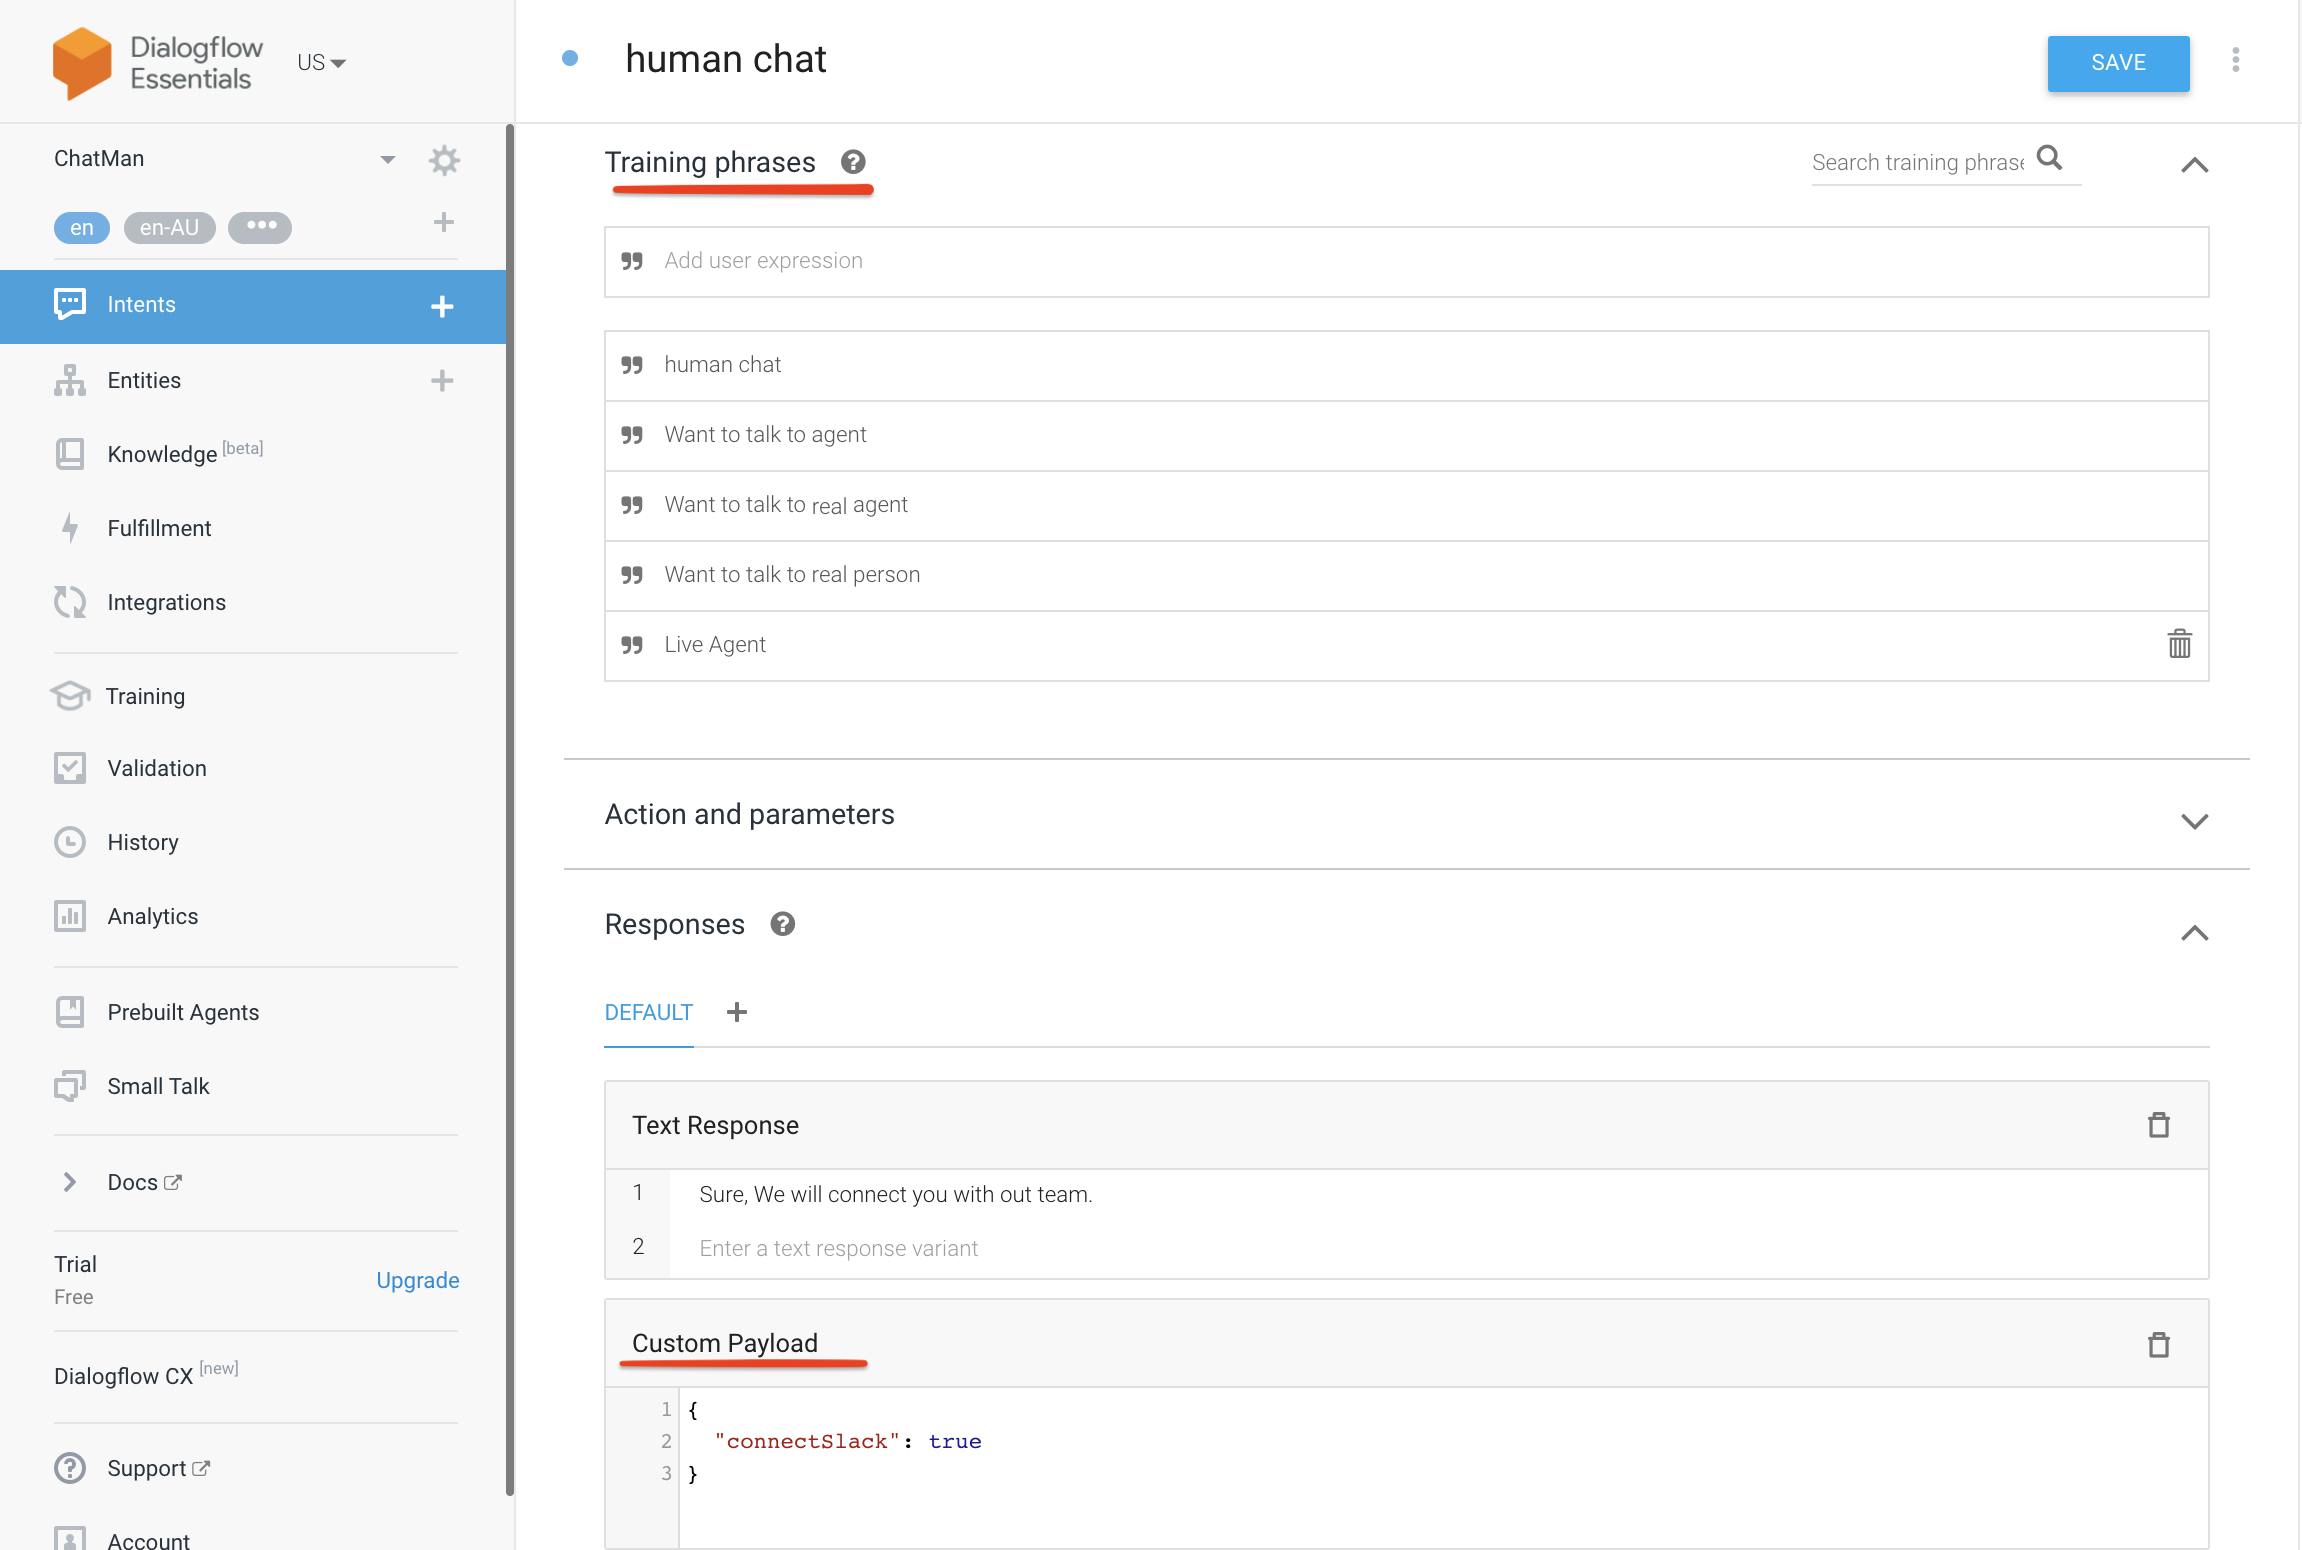
Based on the payload, we can initiate a human-takeover. In this example, we send
connectSlack: trueas a custom payload to pause the ChatBot. Then, we have to initiate a socket connection to interact with support team members. This is further explained belowhandleGoogleResponse = (response) => { const { queryResult } = response; if (!queryResult) { this.appendBotResponse(CONNECTION_ERROR_MESSAGE); } const { fulfillmentMessages } = queryResult; if (fulfillmentMessages) { const text = fulfillmentMessages[0].text.text[0]; // If we have payload from DialogFlow if (fulfillmentMessages[1] && fulfillmentMessages[1].payload) { const payload = fulfillmentMessages[1].payload; if (payload.connectSlack) { // Create a socket connection and send the message const socketOptions = { query: { user: JSON.stringify(this.props.user) }, secure: true, }; this.socket = SocketIo(config.socket.url, socketOptions); // Wait for socket connection to be created before creating channel setTimeout(() => { this.socket && this.socket.emit('createChannel', { user, message }); }, 300); } } } else { // No pre-defined responses const text = `Sorry, I couldn't understand that.`; } }
To set up Slack
Slack is like a chatroom for your whole team. It is a computer application that was created as a way for organizations to communicate both as a group and in personal one-on-one discussions. You can communicate as a group through channels or privately via direct messaging. Steps to integrate Slack with Node in our project:
- First, create a basic Node Js app with a single end-point.
- Next, create an account in Slack and create a new App.
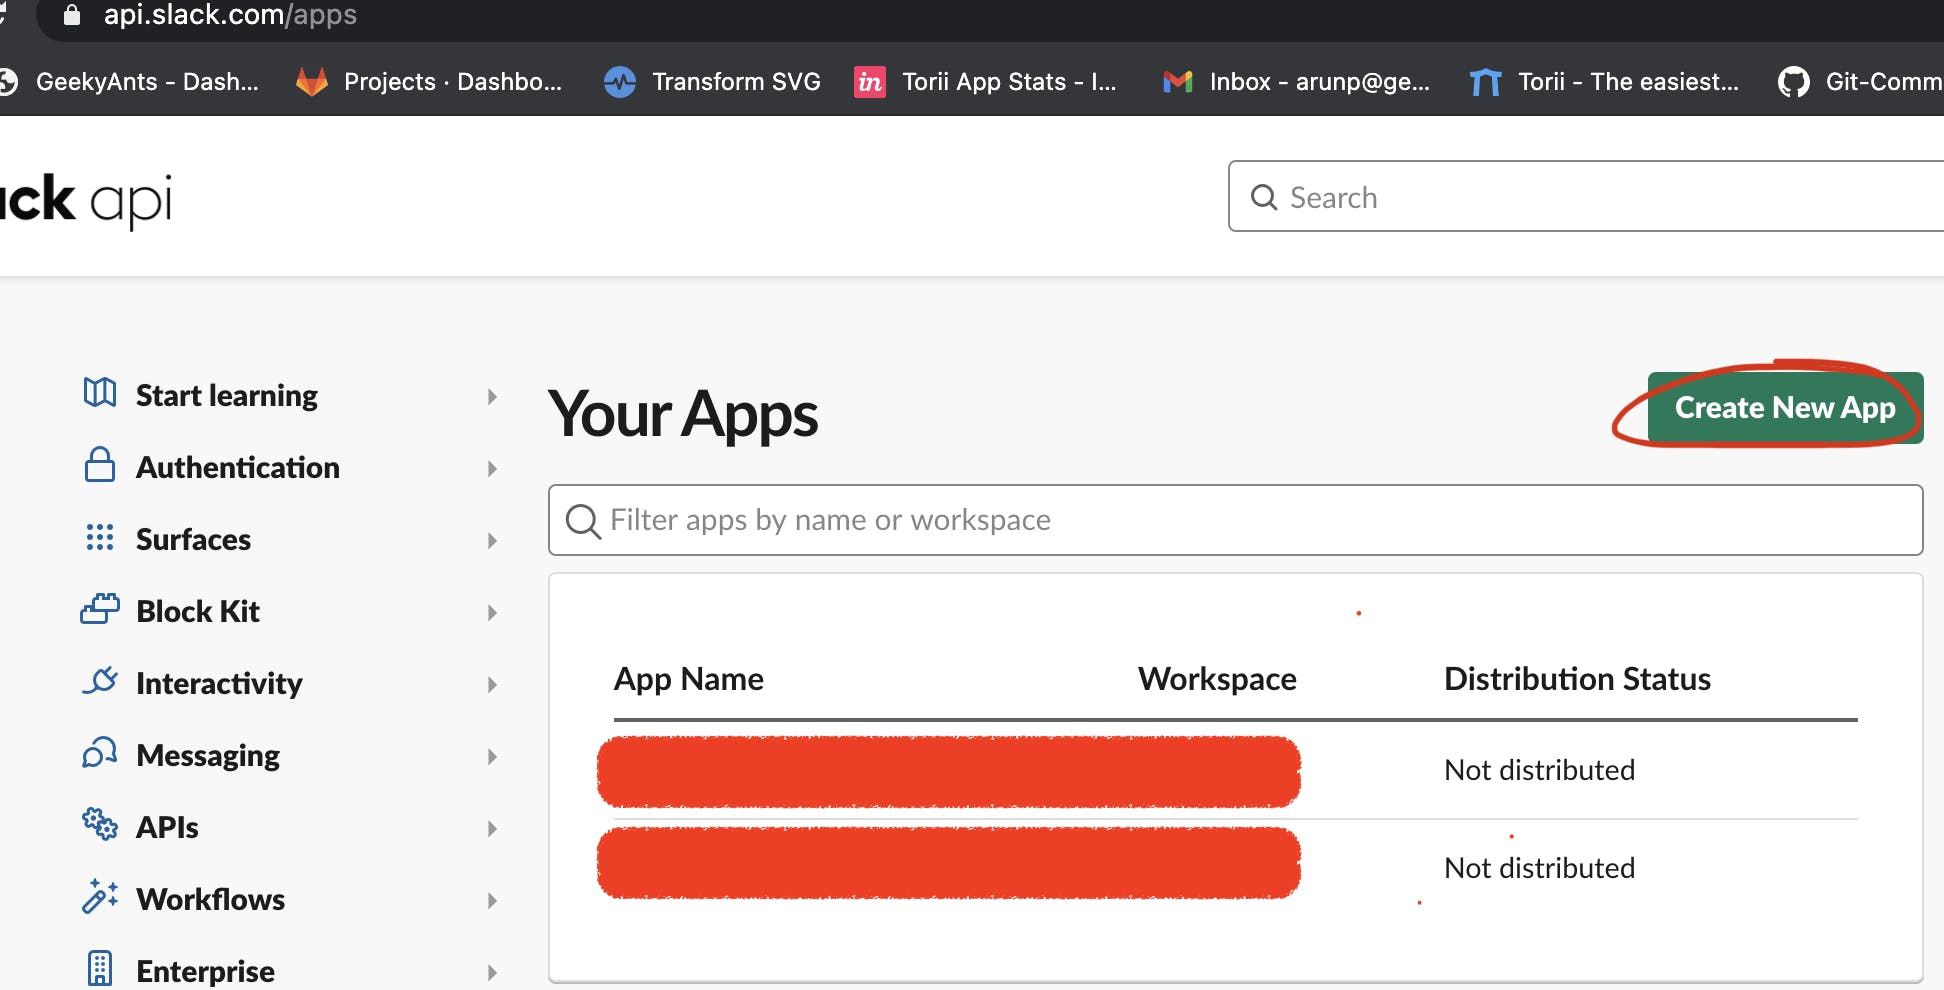
- Get the
Client IDandClient SecretandSigning Secretfrom the Basic Information page. - With this data, we can create OAuth credentials and give required scope permissions from OAuth & Permissions tab. We should end up with a result as the picture shown below, at this point:

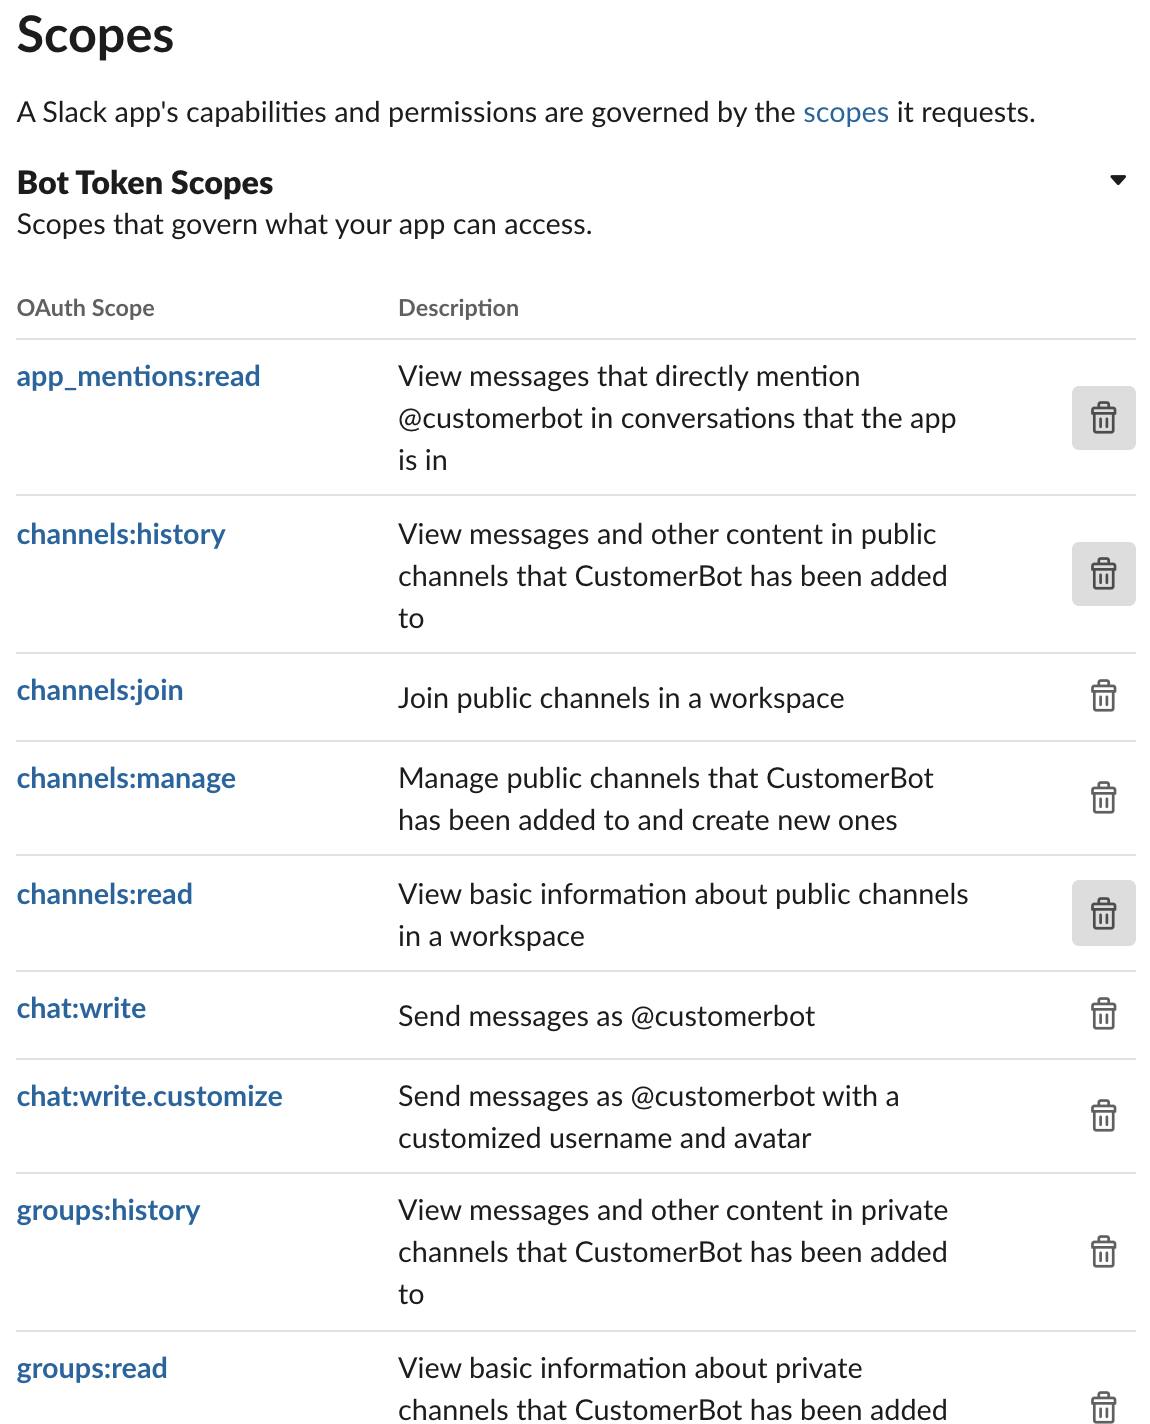
- In the next step, we need to add scopes to the bot. For example, your bot must be able to create a channel so we give
channels:managescope. After following this step, the bot will be enabled to manage public channels, as well enable new ones. Similarly, we also have to issue commands likechannels:joinchannels:readchat:writeetc. Refer to the image given below to understand this concept better:
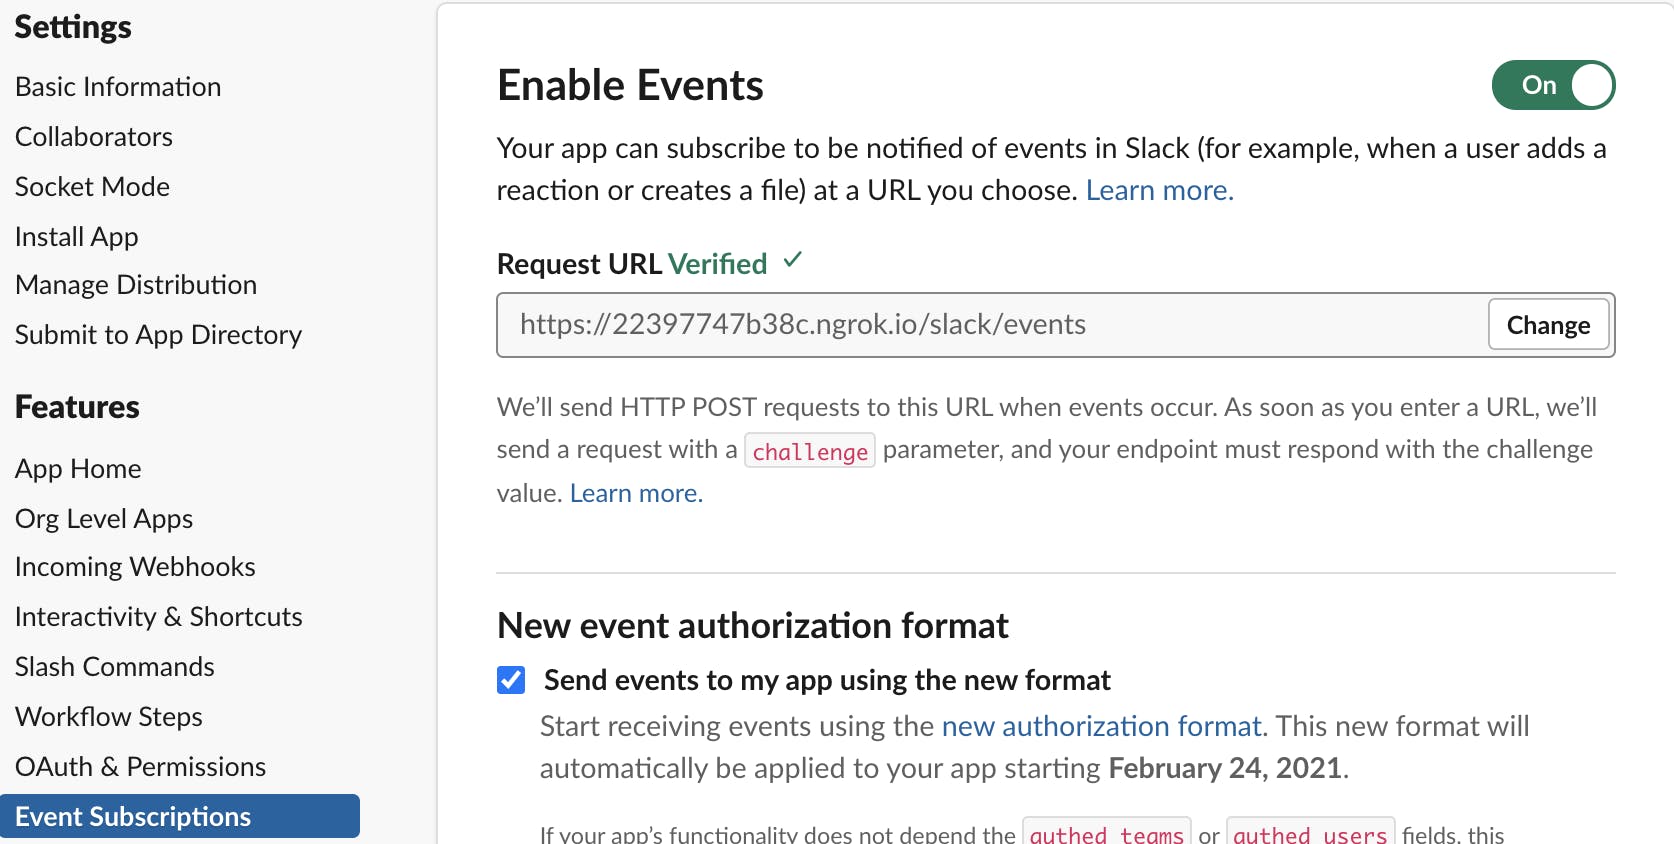
Use
ngrokand create tunnels to provide an endpoint to a Slack Event. This is so that Slack can trigger an event when someone is interacting through the chat medium.
Installation of Slack
To begin, create a basic Express app and install the dependencies shown below:
"dependencies": {
    "@slack/events-api": "^2.3.3",
    "@slack/web-api": "^5.10.0",
    "express": "^4.16.4",
    "socket.io": "^2.3.0",
  "socket.io-redis": "^5.3.0",
}
Implementation of Slack and Socket IO:
We have to create a Slack Channel for every new user. Specified slack members are added to the channel at the time of channel creation with their Slack ID. When a user initiates a socket connection from a client, we can also check information about the event using handle based on the same.
Initiate Socket IO as follows:
  // index.ts
  import express from 'express';
  import { createServer } from 'http';

  const app = express();
  export const server: any = createServer(app);
  export const io = require('socket.io').listen(server);
Create an endpoint for handling Slack events. We need to add a Slack Event Endpoint Middleware before the body-parser. At this point, the code should look like:
  // index.ts
  import SlackSocketClient from './src/util/SlackSocketClient';
  import express from 'express';
  import { createServer } from 'http';

  const app = express();
  app.use(cors(corsOptions));
  export const server: any = createServer(app);
  // Slack event handler - this statement should be before bodyParser
  // Because the adapter can only work if it comes before the body parser in the middleware stack
  app.post('/slack/events', SlackSocketClient.slackEvents.expressMiddleware());
  app.use(bodyParser.json({ limit: '10mb' }));
Next, we have to initialise the Slack Client using the following tokens:
  // SlackSocketClient/index.ts
  import { WebClient } from '@slack/web-api';
  import { createEventAdapter } from '@slack/events-api';
  const SLACK_BOT_TOKEN = (process as any).env.SLACK_BOT_TOKEN;
  const SLACK_BOT_SIGNING_SECRET = (process as any).env.SLACK_BOT_SIGNING_SECRET;

  this.slackEvents = createEventAdapter(SLACK_BOT_SIGNING_SECRET);
  this.slackWeb = new WebClient(SLACK_BOT_TOKEN);
After this, define the Socket connection and create callbacks for the respective events. This step is better understood with the usage of the following code:
  // index.ts
  // Socket connections
  // This is used for opening a socket connection with the client for our chatbot
  io.on('connection', async (socket: any) => {
  // When we receive a message from the client
  socket.on('clientMessage', (data: any) => {
  // Send to Slack
  SlackSocketClient.sendToSlack(data);
  });
  // Create a Slack channel
  socket.on('createChannel', (data: any) => {
    SlackSocketClient.joinOrCreateChannel(data, socket);
  });
  // Log socket errors
  socket.on('error', (err: any) => {
    Logger.log(err, 'error');
  });
  socket.on('disconnect', () => {
      // Disconnect the socket
      socket.disconnect(true);
    });
  })
When a new user is initiating a socket connection and sending
createChannelevent, the first step is to check is there is an existing channel for the user. If so we join the same channel or else we have to create a new channel. For this example, we shall create the Slack channel name in a standard format such asdev-{firstName}{lastName}-{user.id}→dev-JamesBond-1. This is as shown below:// SlackSocketClient/index.ts async createChannel(data: any, socket: any, messageToSend: string) { const channelToUse = formatChannelName(data.user); // Create a channel on Slack for the new user const response: any = await this.slackWeb.conversations.create({ token: SLACK_BOT_TOKEN, name: channelToUse, is_private: false, user_ids: SLACK_TEAM_MEMBER_IDS, }); // Set channel topic as client's email for reference await this.slackWeb.conversations.setTopic({ token: SLACK_BOT_TOKEN, channel: response.channel.id, topic: data.user.email, }); // Invite team members to the channel on Slack await this.slackWeb.conversations.invite({ token: SLACK_BOT_TOKEN, channel: response.channel.id, users: SLACK_TEAM_MEMBER_IDS, }); }Once the channel is created, we use it as an identifier while making sure the socket joins into the room. We can also store the
socket-channelIdmapper in Redis as shown:
Redis (Remote Dictionary Server) is a fast, open-source, in-memory key-value data storage which can be used as a database. For instance, if your application has data stored in a HashMap, and you want to store that data in a data store – you can simply use the Redis hash data structure to store the data.
```tsx
socket.join(channelId);
```

```tsx
// SlackSocketClient/index.ts
/**
   * Post a message to Slack channel
   * @param {string} channel - channelId
   * @param {string} message - message to be posted
   * @memberof SlackClient
   */
  async postSlackMessage(channel: string, message: message, user?: any) {
    // TODO: If user does not have an avatar we need to show a generic image(instead of undefined)
    await this.slackWeb.chat.postMessage({
      channel,
      text: `${message}`,
      username: user ? `${user.firstName} ${user.lastName}` : 'ChatBot',
      icon_url: user
        ? user.picture
          ? user.picture
          : undefined
        : 'https://geekyants.s3.amazonaws.com/ChatBot_Avatar.png',
    });
  }
```
The channel will be created and messages sent from clients will be posted in Slack. When someone is responding to the Slack message, the Slack events are triggered and are handled through the defined route handler.
Slack events are triggered based on the actions being performed on the channel (i.e.,)
channel creation,message,app_mention,channel_deleted,channel_archive, etc. We have to look for the specific event performed by specific user in order to handle the event. To do this:```tsx // SlackSocketClient/index.ts export interface SlackEvent { client_msg_id: string; type: string; text: string; user: string; ts: string; team: string; blocks: any; channel: string; event_ts: string; channel_type: string; subtype: string; bot_id: string; } ```Once we get the correct event with the proper payload, we can extract the message and send it back to the client using Socket. Since we used Slack's
channelIdas an identifier, this makes it easier to send it back to a particular socket, ignoring the sockets present in the room, like this:```tsx // SlackSocketClient/index.ts import { io } from '../../../index'; this.slackEvents.on('message', async (event: SlackEvent) => { // We want events only when a message is typed by a team member if (event.type === 'message' && !event.subtype && !event.bot_id) { io.of('/').adapter.allRooms((error: any, rooms: any) => { if (rooms.indexOf(event.channel) >= 0) { // Socket is active so send message to user const { message, payload } = extractAndFrameMessage(event); // Send the message to the socket.io "room" io.to(event.channel).emit('TeamMessage', { message, payload }); } }) } }) ```
- Similarly, we can handle multiple slack events. Slack provides many options for events, which can be customised, to integrate and use the Slack API for multiple purposes. There are chances, the socket connection might get closed if the mobile app is left in the background for a long time or the user hard closes the app. In which case, we check if the socket is present in the Socket Room using
rooms.indexOf(event.channel) >= 0. If the socket is not present, we can trigger a push notification and re-initiate the socket connection by opening the notification on your mobile (provided that we have the Push Token in the DB).
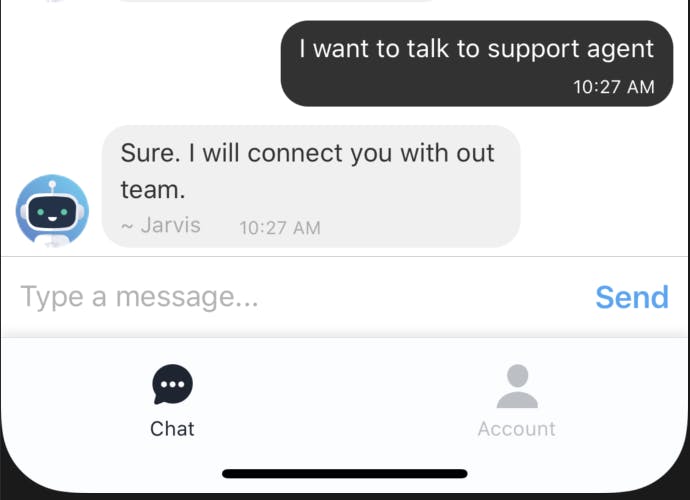
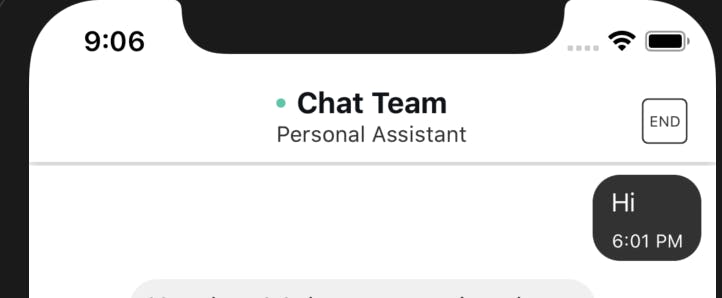
The end result of integrating Live Support and ChatBot should look like:

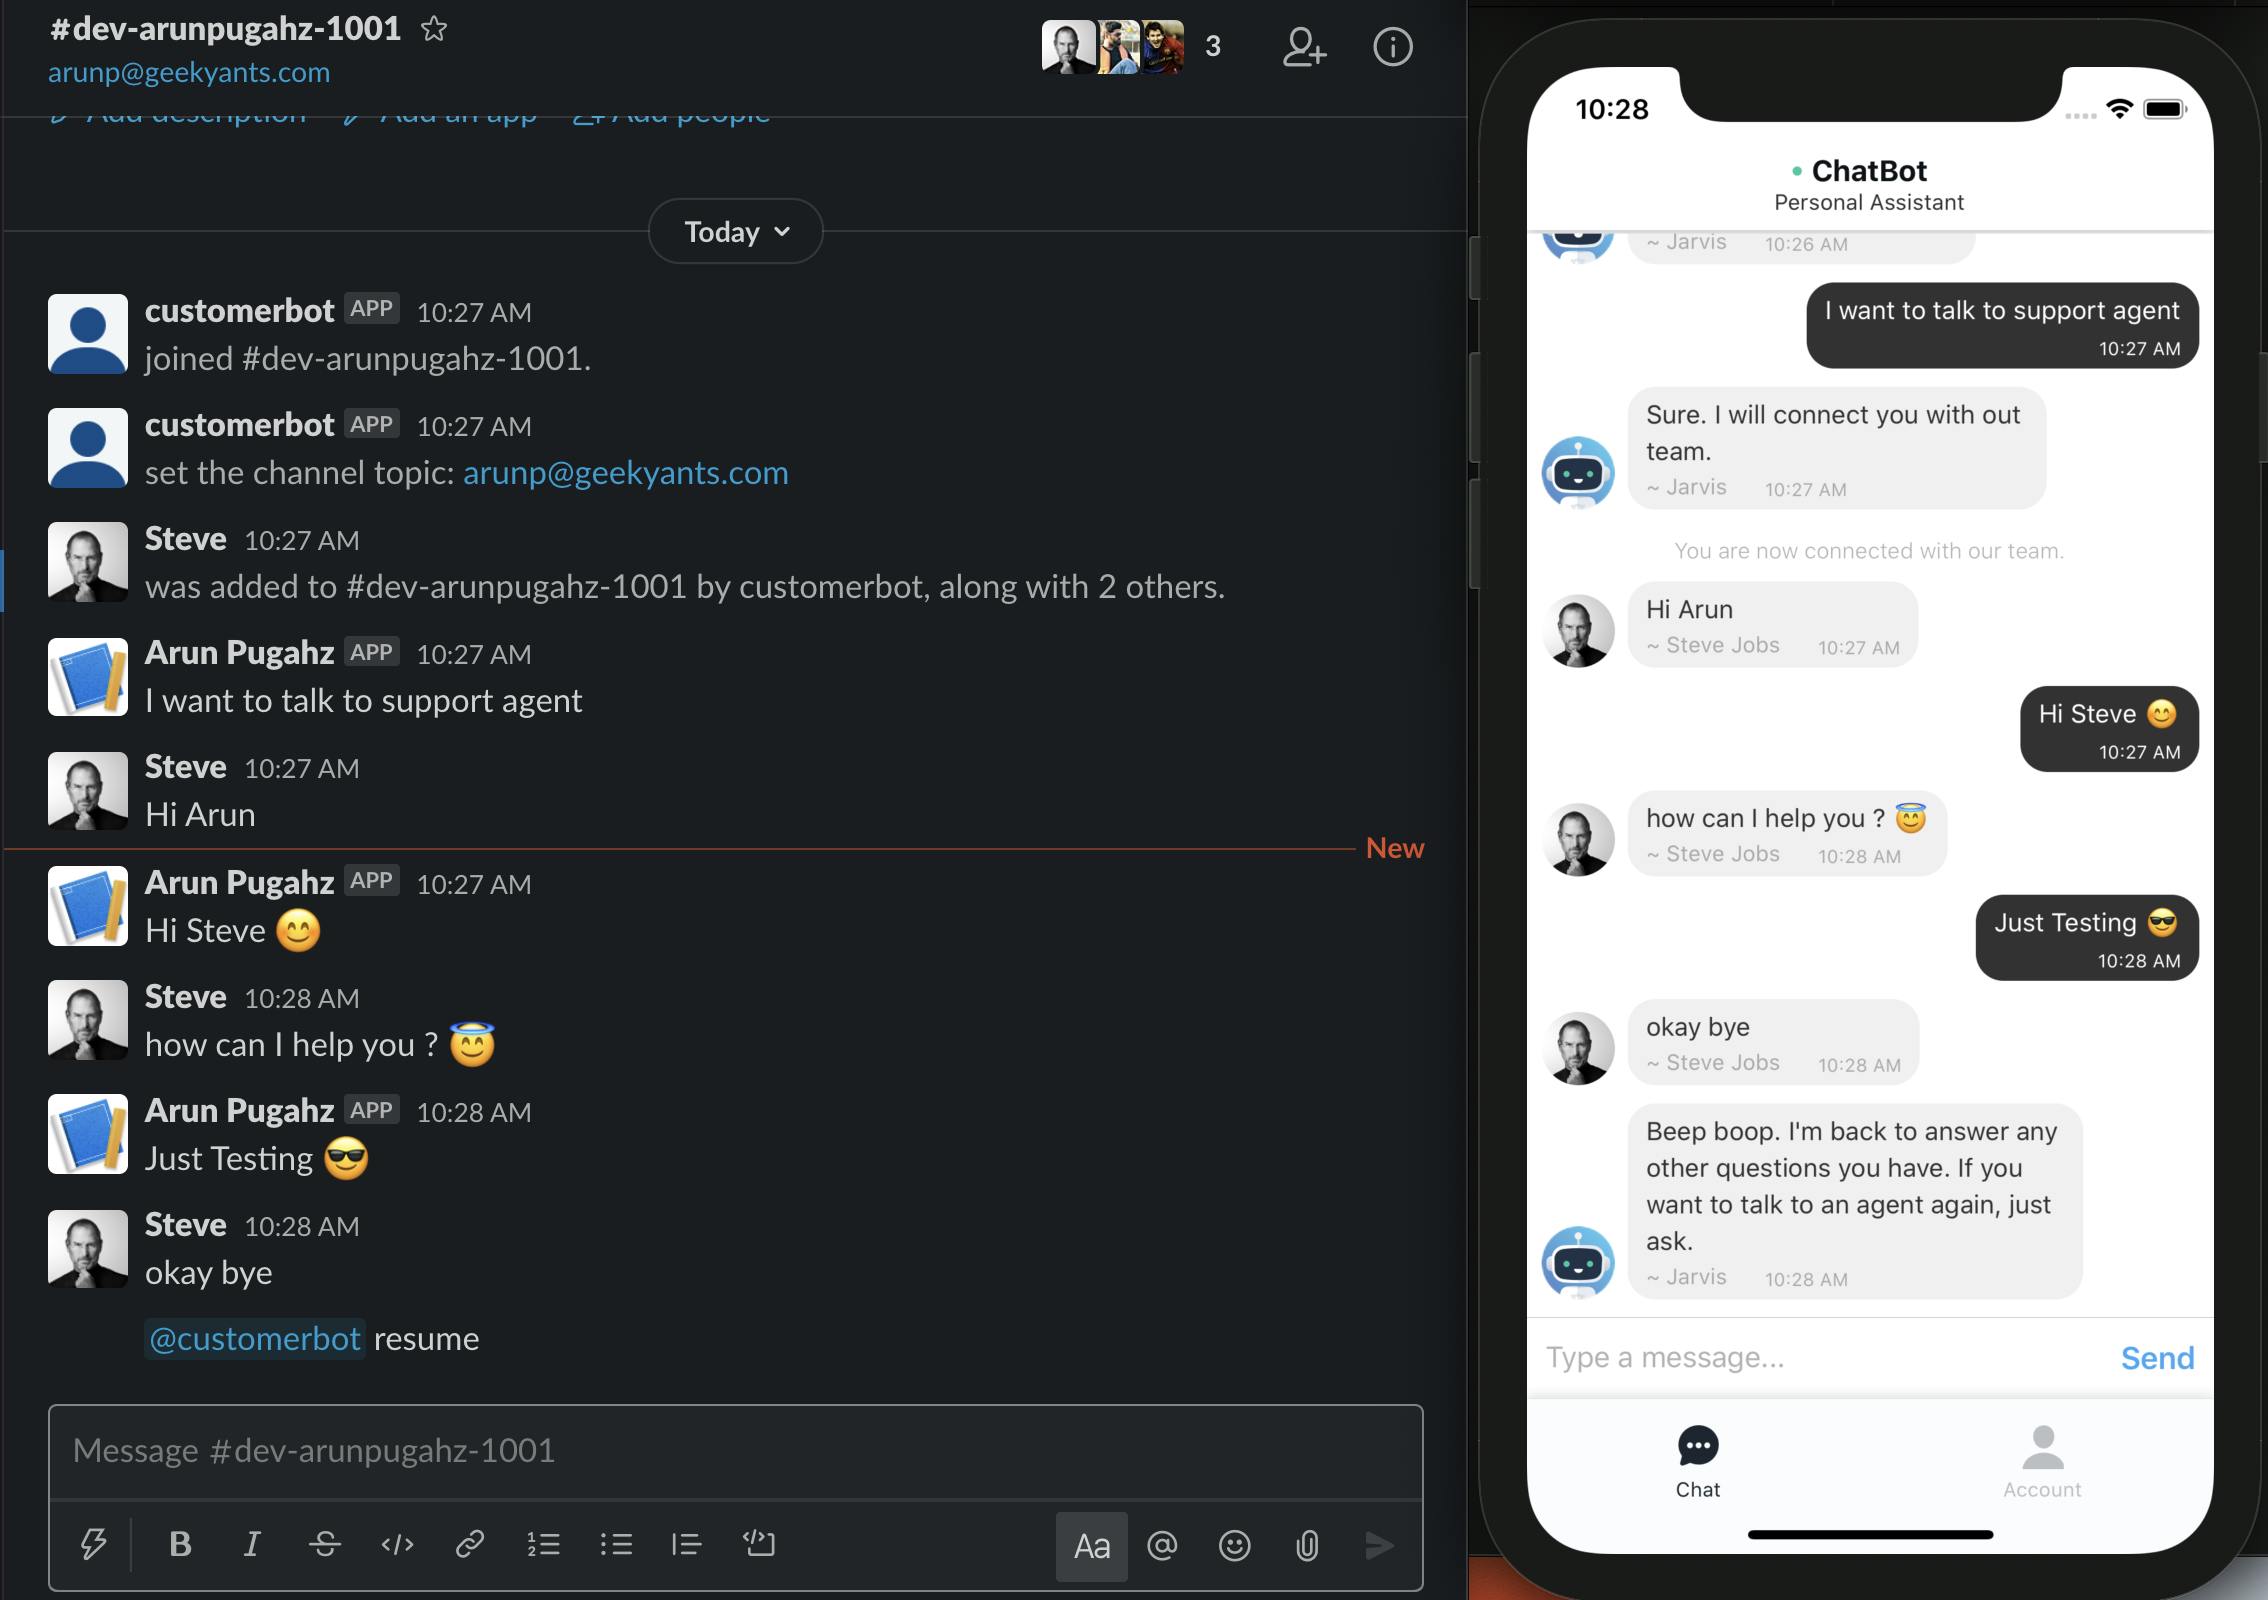
Transferring from ChatBot to Live Support
When the user asked for Live Support, we paused the ChatBot to hand over the chat to the Support Team. Now we need a way to return the control back to ChatBot. There are two ways to do this:
- The Client themselves can disconnect the Socket, which will automatically enable the ChatBot.
The Support Team can type a specific keyword through Slack Events to send a message and the payload to the client through a socket, which in turn resumes the ChatBot. Here, we need to mention the Slack Bot and type our keyword in order to trigger
app_mentionevent and'@ChatBot resume'Once we receive this event, we send a custom payload to let the client know he can resume the ChatBot.
  // SlackSocketClient/index.ts
  disconnectUser(socketId: string, event: SlackEvent) {
      const channelId = event.channel;
      const socket = io.sockets.connected[socketId];
      this.sendToUser(channelId, '', { resumeBot: true }, true);
      socket.disconnect(true);
  }
Issues and Fixes
In case there's a mismatch between the Socket IO and Socket IO Client version, make sure the socket server is able to communicate with the client's socket and vice-versa.
For smooth Slack integration, we need to provide proper permissions and scope accessories by subscribing to required events.
When enabling event subscriptions, make sure you provide your server app's URL to Slack Event Subscriptions to receive events occurring in Slack.
One of the major issues faced with the live support implementation is socket disconnection. We can fix that by mapping the Slack channel to
SocketIdand storing it in Redis.
Comments
Post a Comment
Thank You.